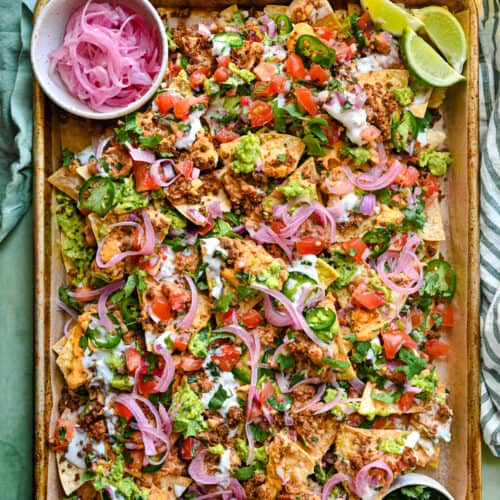
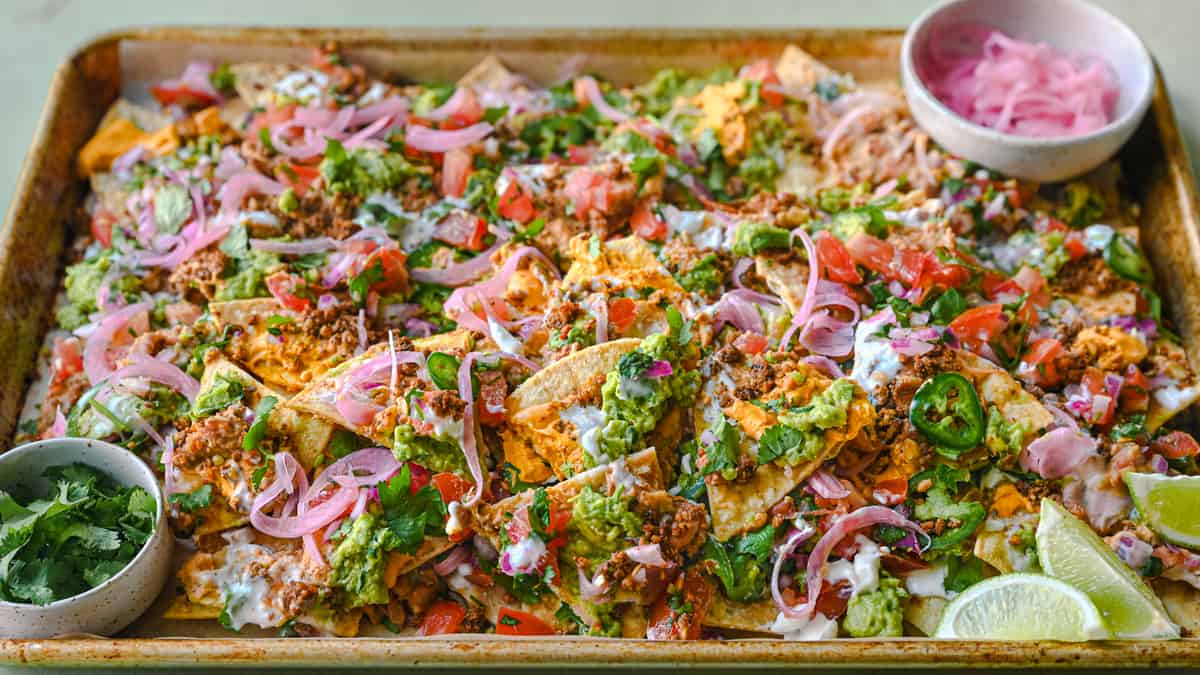
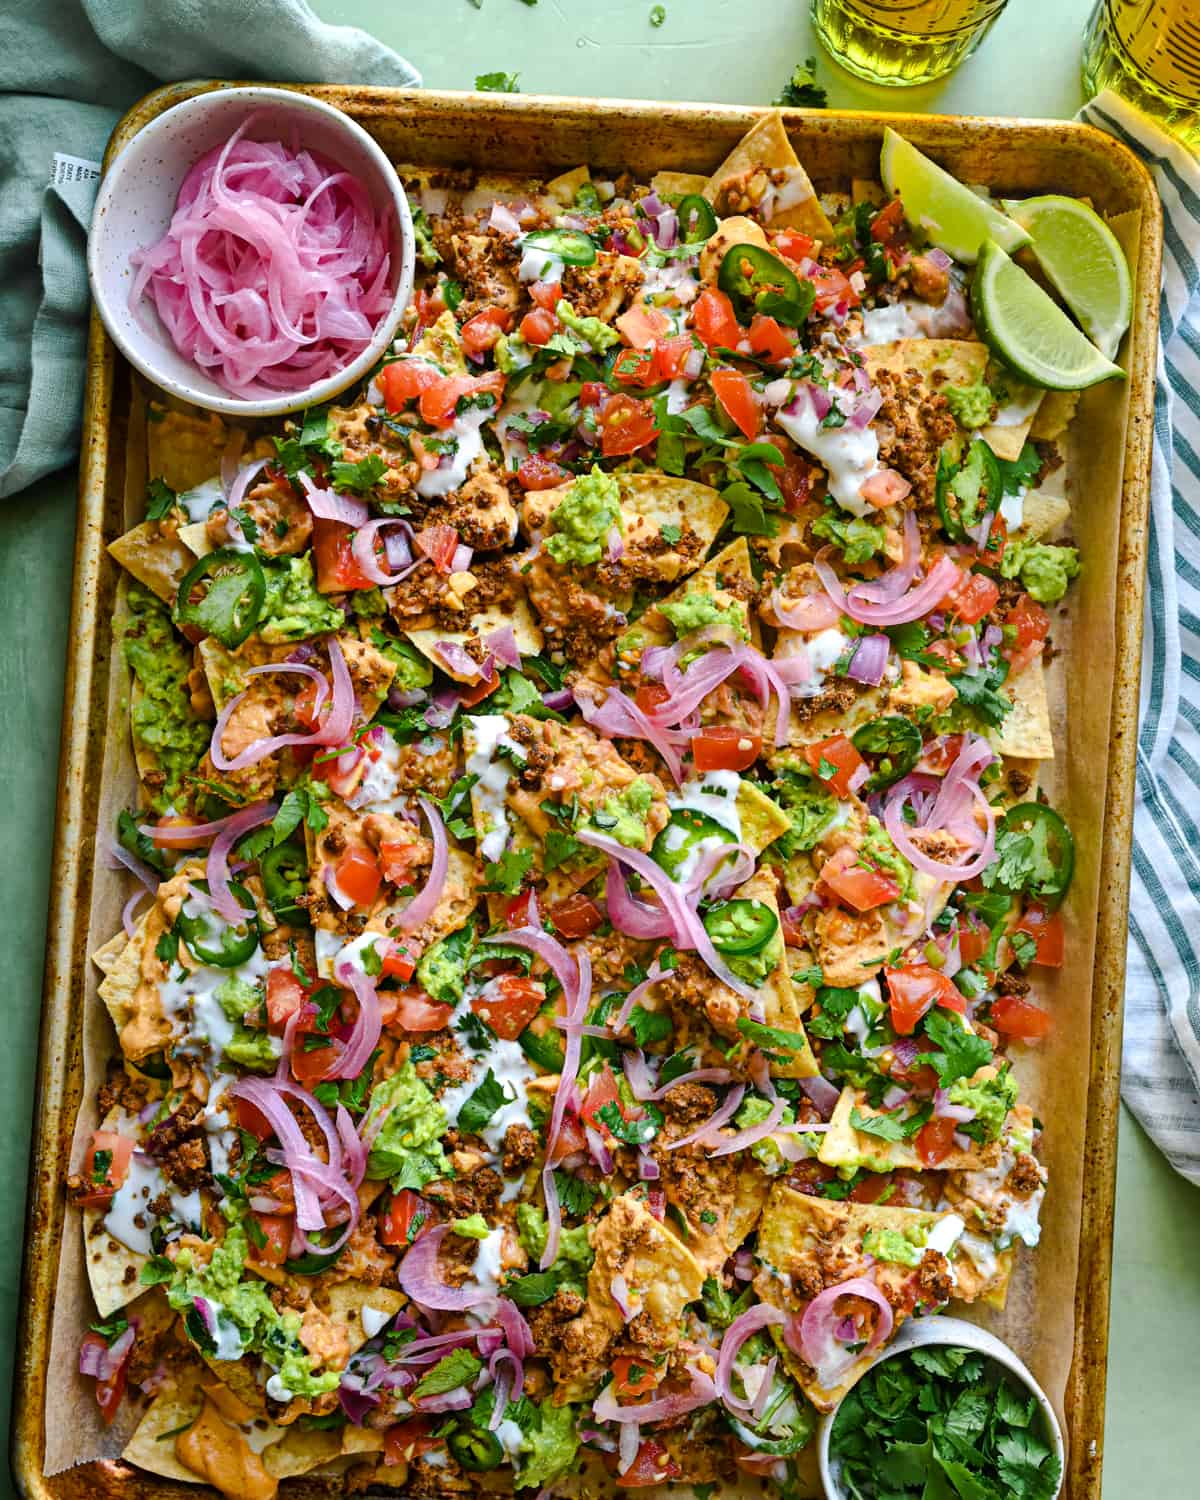
These loaded Vegan Nachos are so good you’ll want to throw a party just so you can make them. Thick, crispy tortilla chips get layered with my fan-favorite vegan queso, along with walnut-mushroom taco meat, saucy refried beans, guacamole, pico de gallo, vegan sour cream, and pickled onions.
It’s an explosion of flavors (salty, cheesy, spicy, tangy, fresh) and is guaranteed to be your best-ever nacho experience. These are restaurant-quality nachos that will literally blow your mind!
Whip up a batch for Game Day, Cinco de Mayo, or any get together with friends, and watch yourself become the most popular person in the room (yes, they’re that good!). But they’re also filling enough to make for a dinner, if you’re in the mood for nacho night!
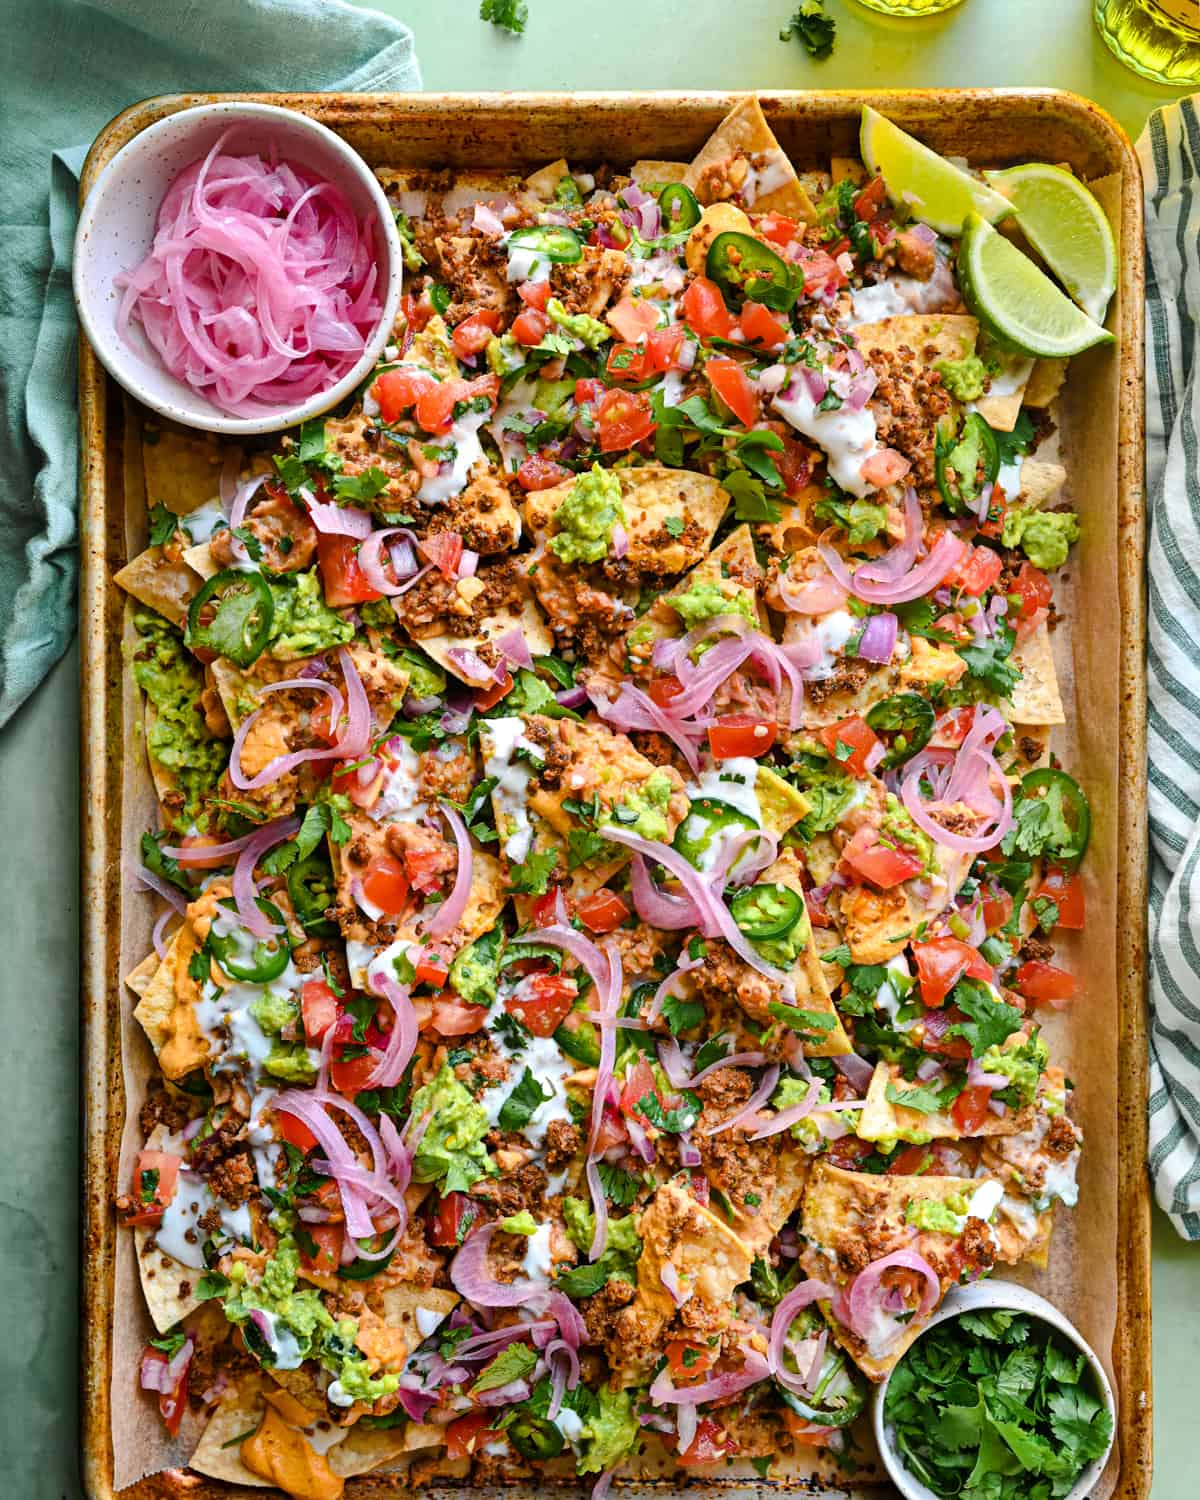
What kind of toppings can you add to vegan nachos?
Just like with my vegan crunchwrap supreme or my vegan breakfast burritos, you have loads of freedom to customize vegan nachos to your heart’s content (so long as you make a few switches to eliminate animal-based toppings, of course.)
This post contains instructions for making everything from scratch, except tortilla chips. However, you can also swap out my proposed toppings for store-bought alternatives.
- Vegan Queso: my addictively good vegan queso takes 5 minutes to blend up, and 5-8 minutes to warm up, so it’s very low-maintenance. I don’t recommend replacing this with a store-bough alternative because it’s what really makes these nachos.
- Vegan Taco Meat: this recipe takes less than 20 minutes and is so easy. You can, however, replace it with your favorite store-bought vegan ground meat/meatless crumbles (stir in the homemade taco seasoning from my recipe for more flavor).
- Refried Beans: I’ve got a simple recipe down below that you’ll want to use for all kinds of tacos, burritos, and quesadillas.
- Guacamole: The guacamole recipe makes enough to have some extra guac on the side, as a dip.
- Pico de Gallo: Feel free to sub with store-bought fresh salsa or your favorite jarred salsa.
- Vegan Sour Cream: I’ve included my homemade recipe, but we typically use store-bought for convenience (We love the Tofutti and Kite Hill brands).
- Pickled Red Onions
- Sliced Jalapeños
- Cilantro
- Chopped Scallions
The truly essential toppings for these nachos are the queso and either the taco meat or refried beans, or both; you can customize everything else.
Many of these toppings can be made in advance, making assembly fairly quick (check out the FAQ section for more info).
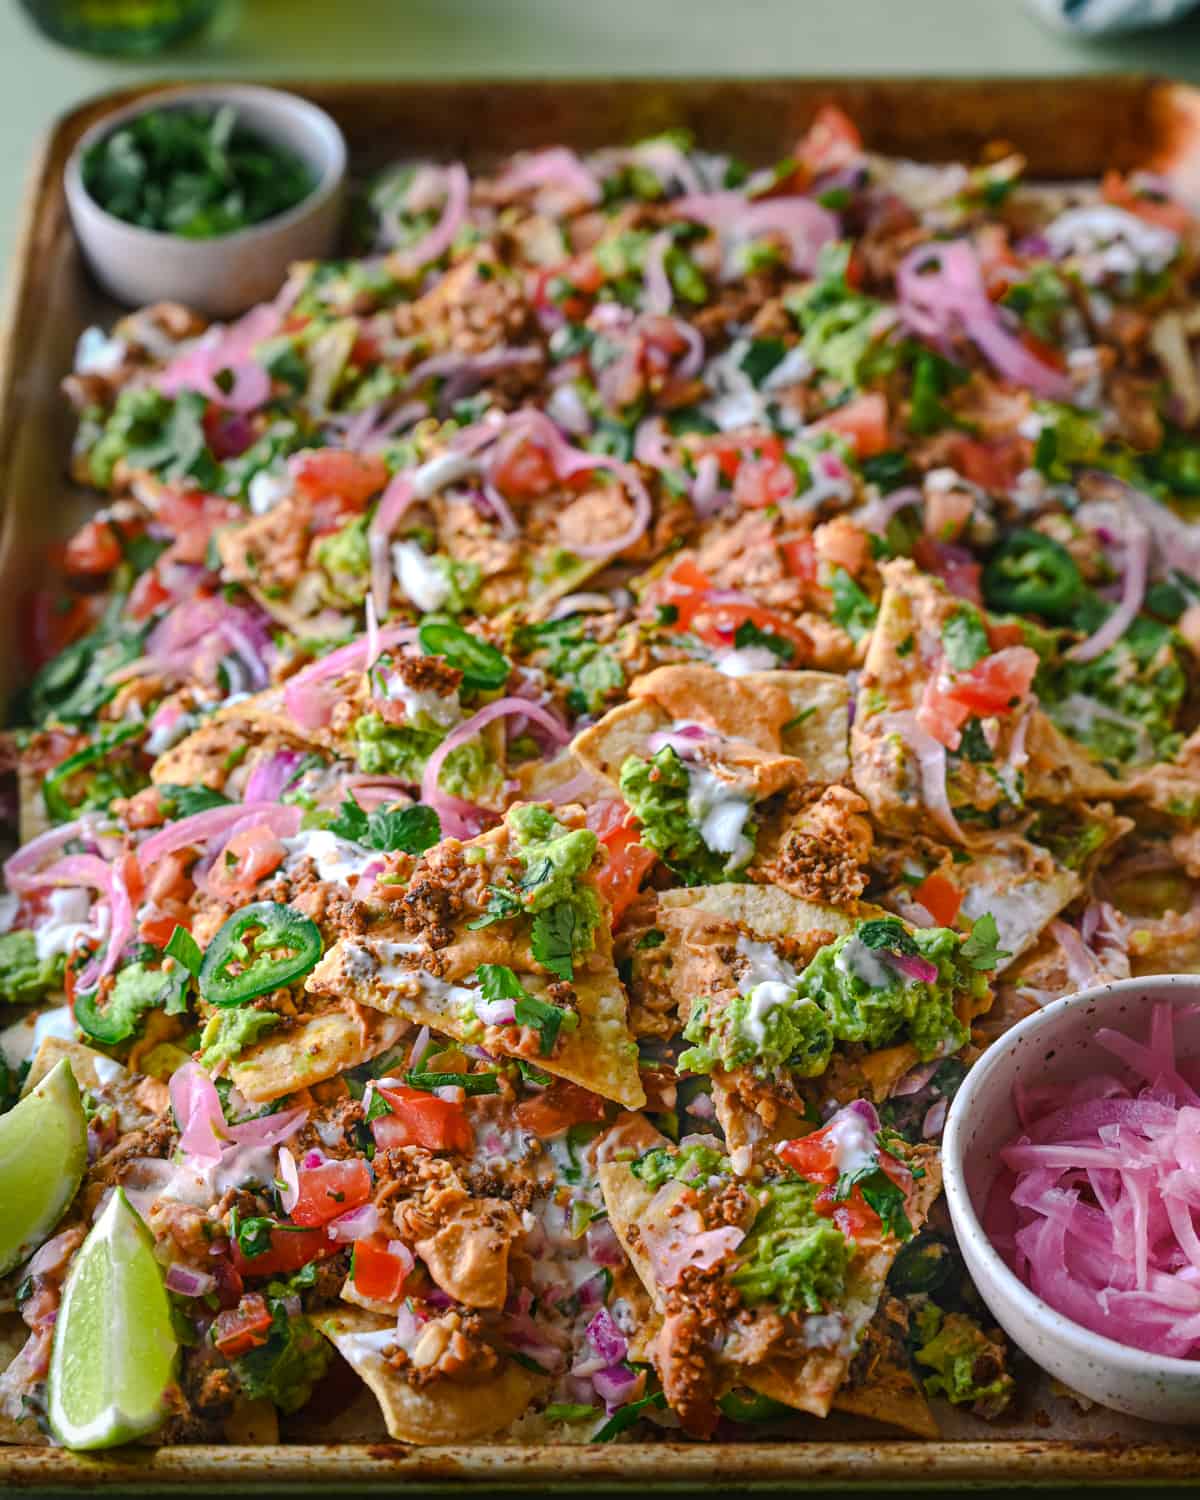
Step-by-Step Instructions for Vegan Nachos
Below you’ll find step-by-step instructions and photos for (1) walnut-mushroom taco meat, (2) saucy refried beans, and (3) queso, and (4) nacho assembly.
Walnut-Mushroom Taco Meat
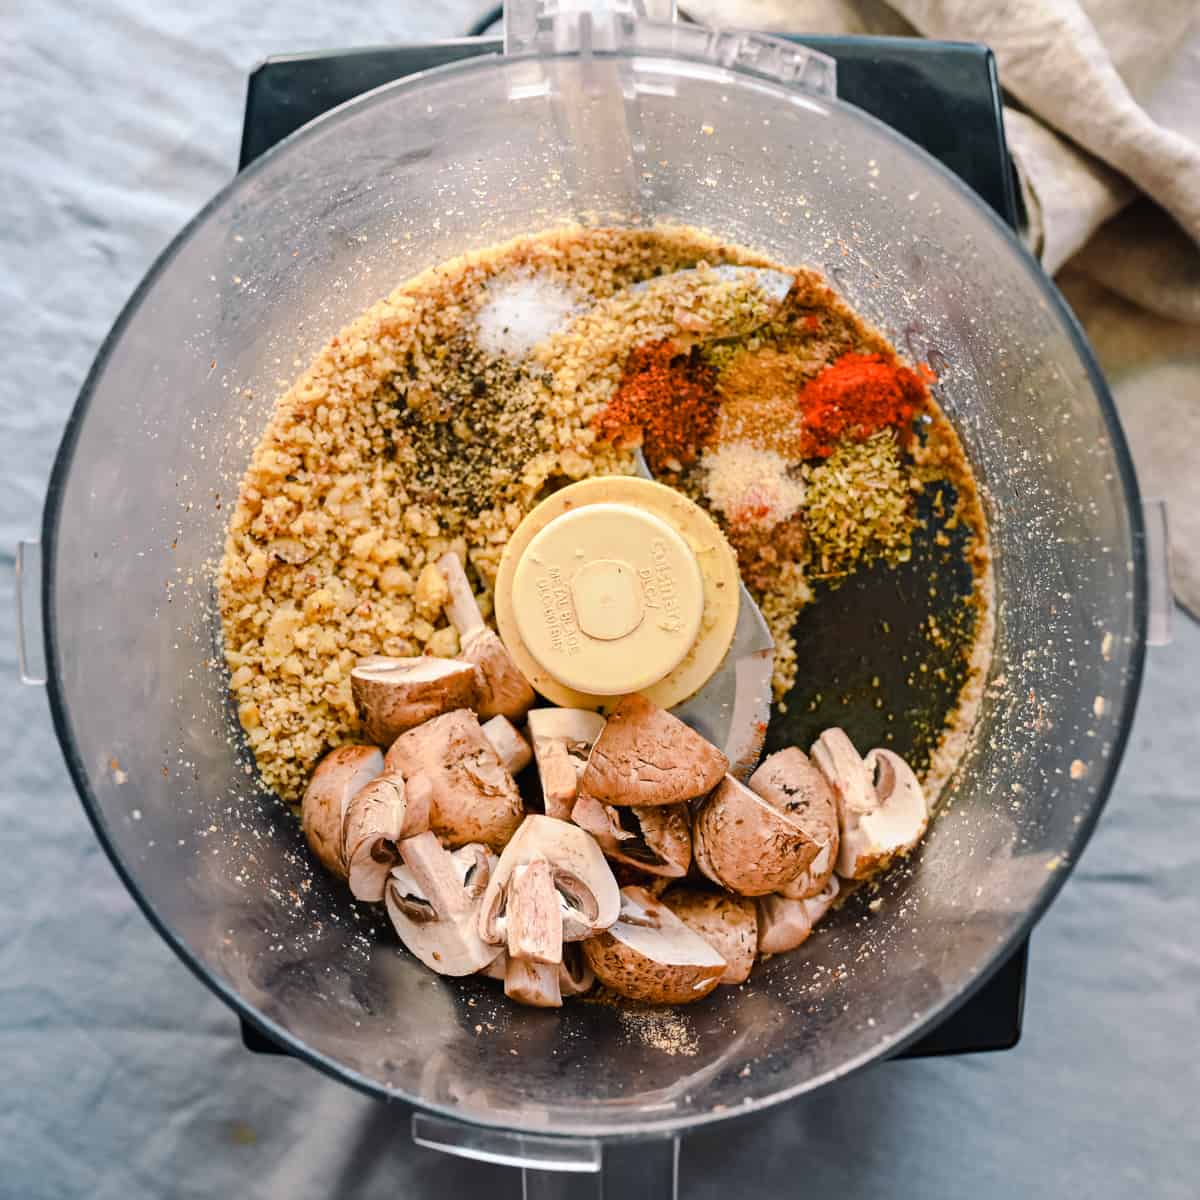
Add the toasted walnuts to a food processor and blend briefly until finely chopped. Add the chopped mushrooms, homemade taco seasoning, salt/pepper, lime juice, and soy sauce.
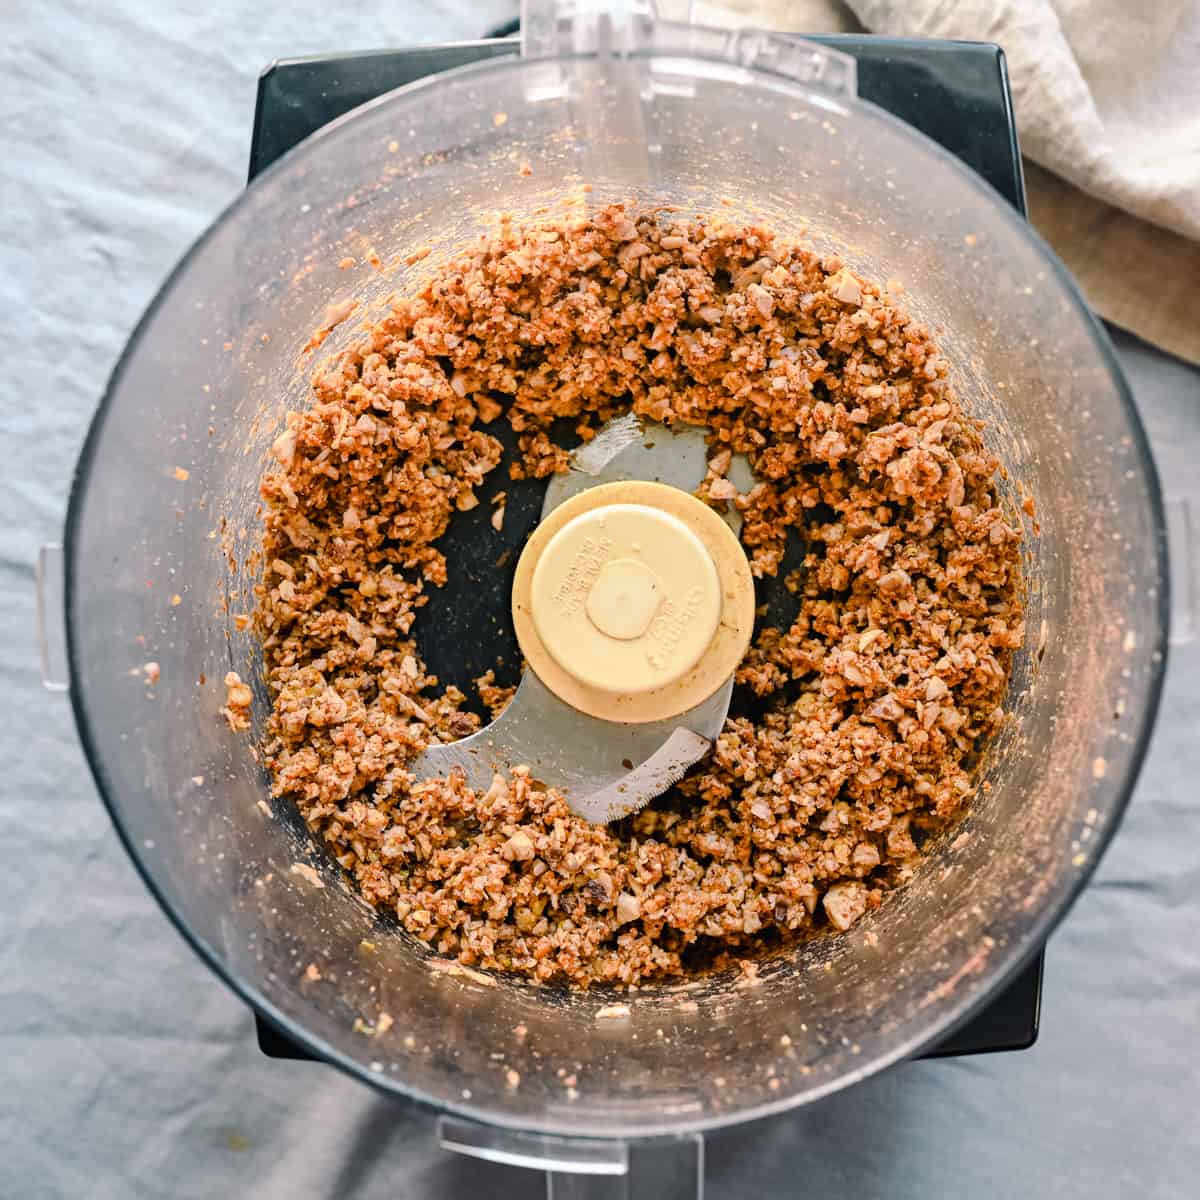
Pulse repeatedly until the mixture is finely chopped, but not smooth like patê.
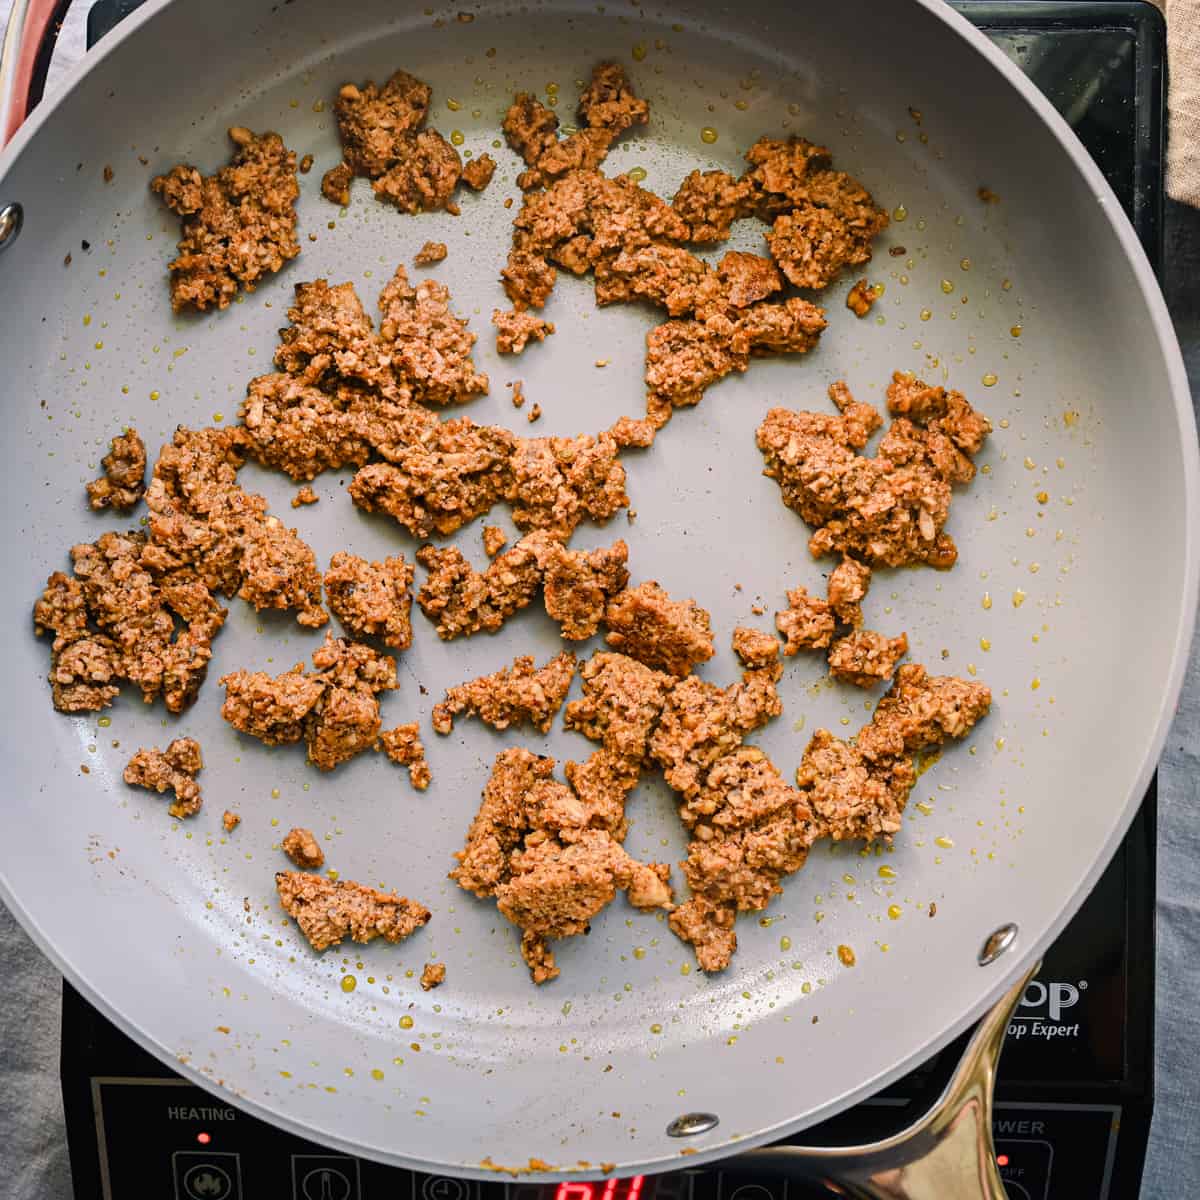
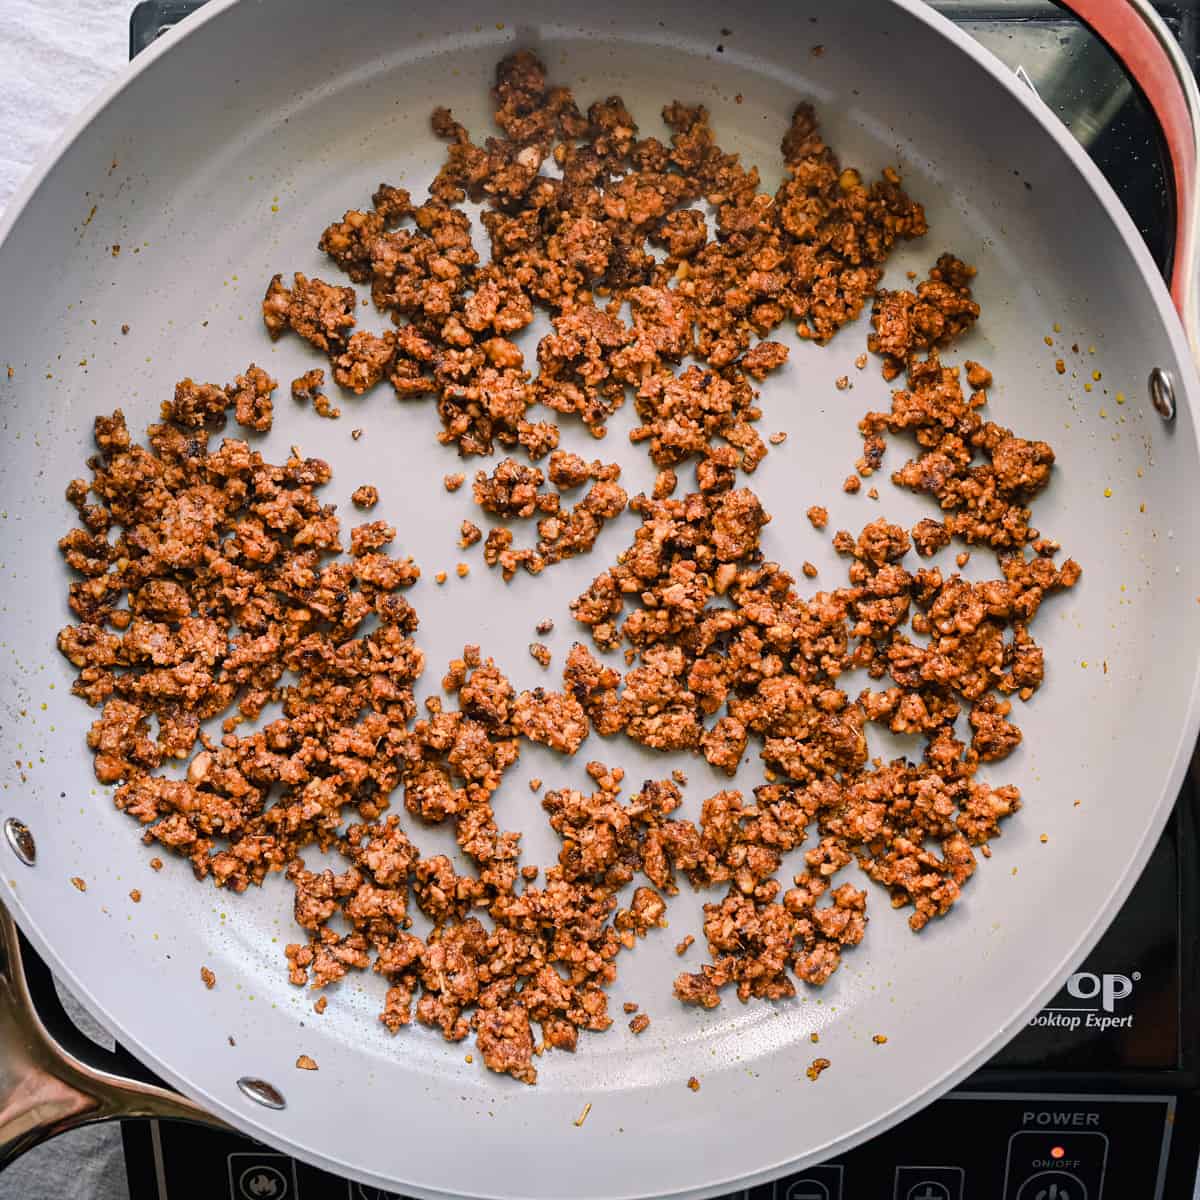
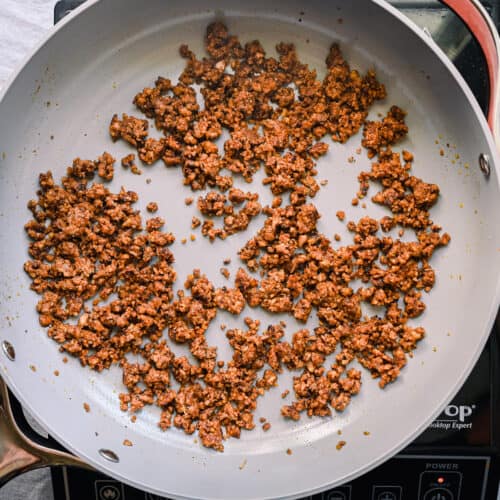
Heat a large frying pan with a bit of oil over medium-high heat. Once hot, add the taco meat, breaking it up with a spatula, for 5-7 minutes, until browned and a bit crispy.
Saucy Refried Beans
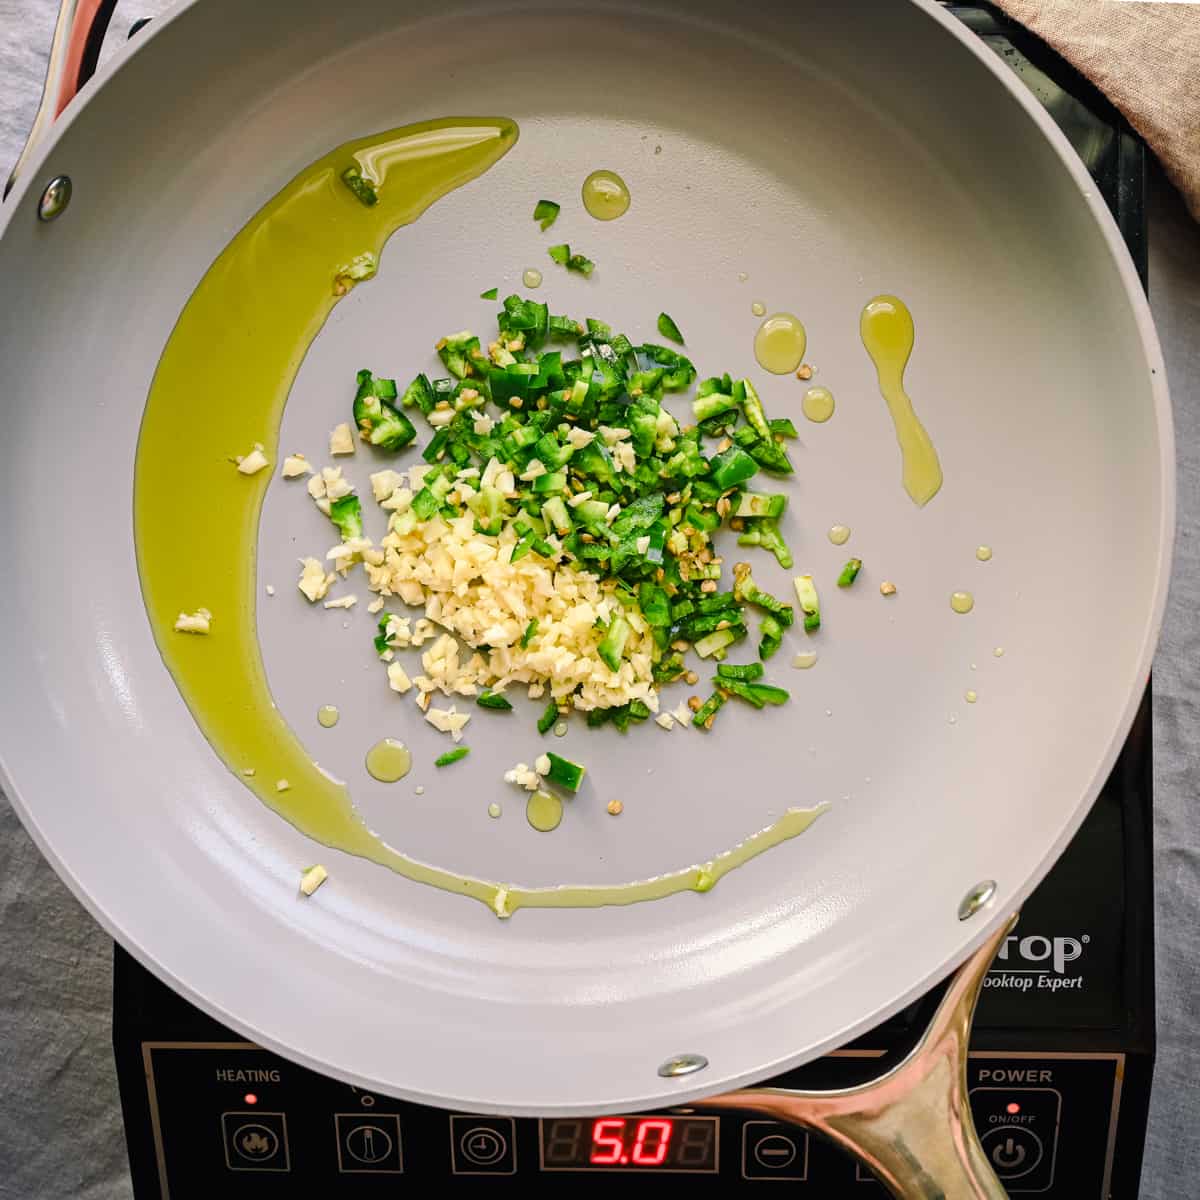
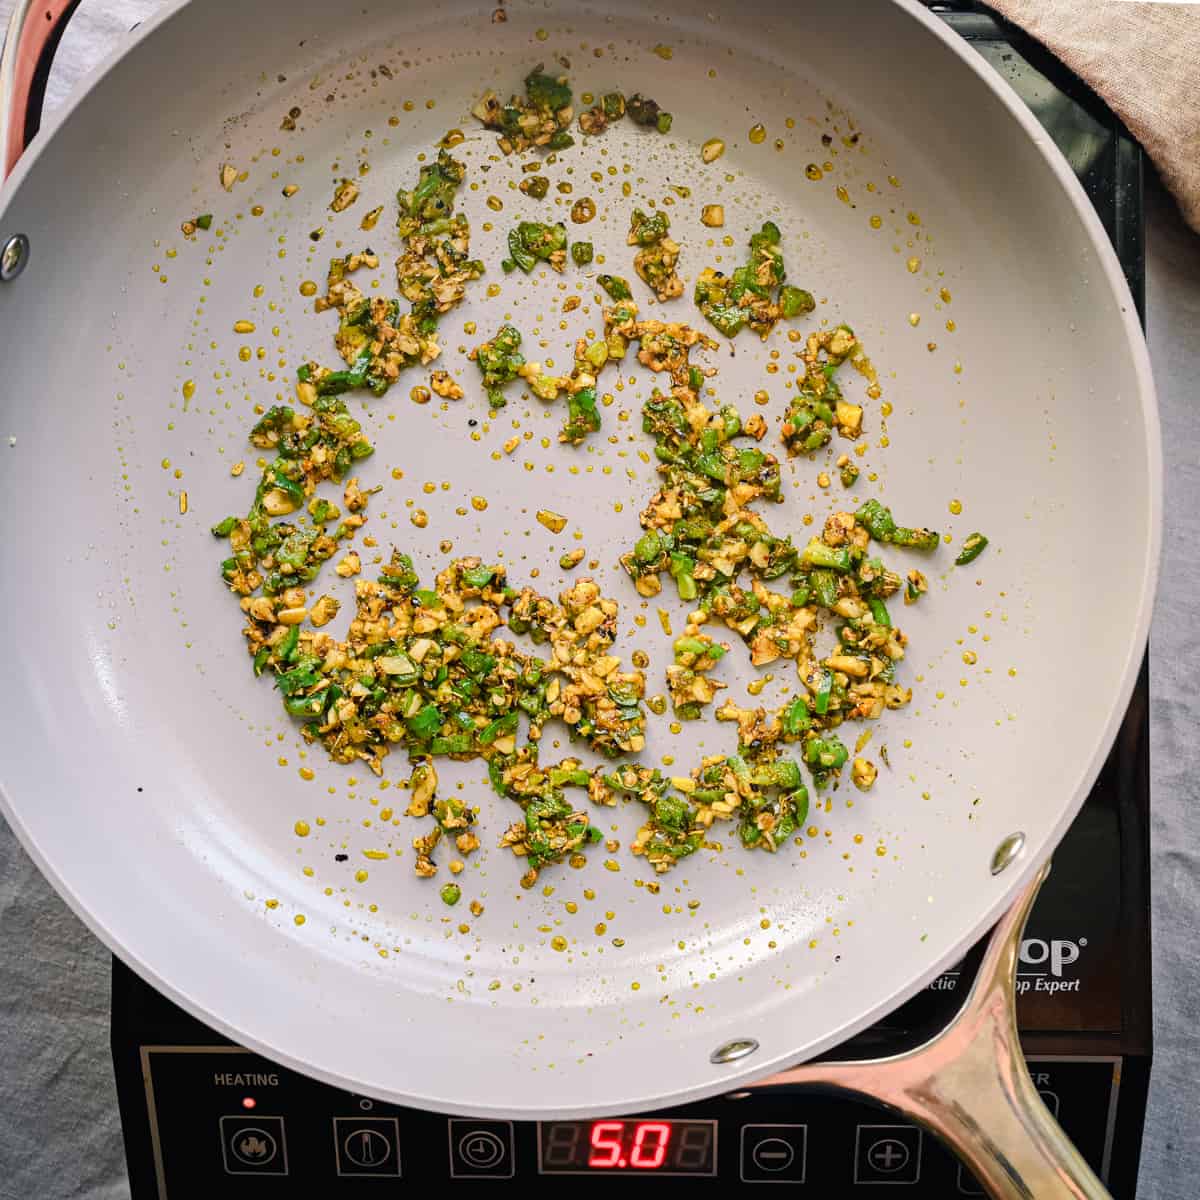
Heat the oil in a large frying pan over medium heat. Add the garlic and jalapeños and sauté 1-2 minutes. Add the oregano, chili powder, and cumin and stir for 1 minute.
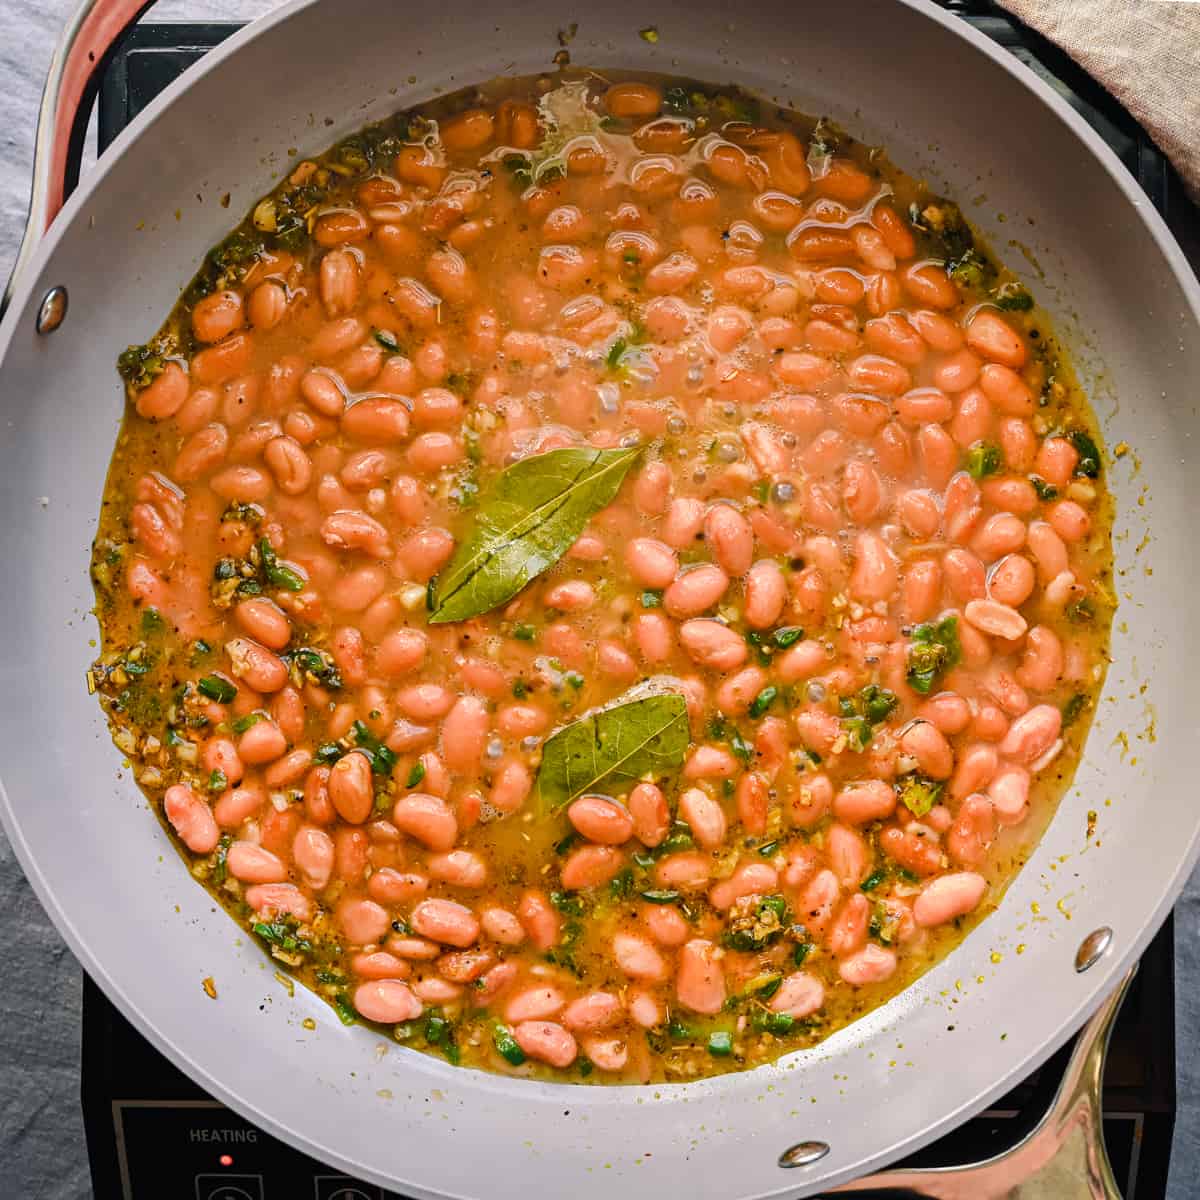
Pour in the canned beans, along with their bean liquid, and bay leaves. Cook 5-7 minutes, until saucy and thickened.
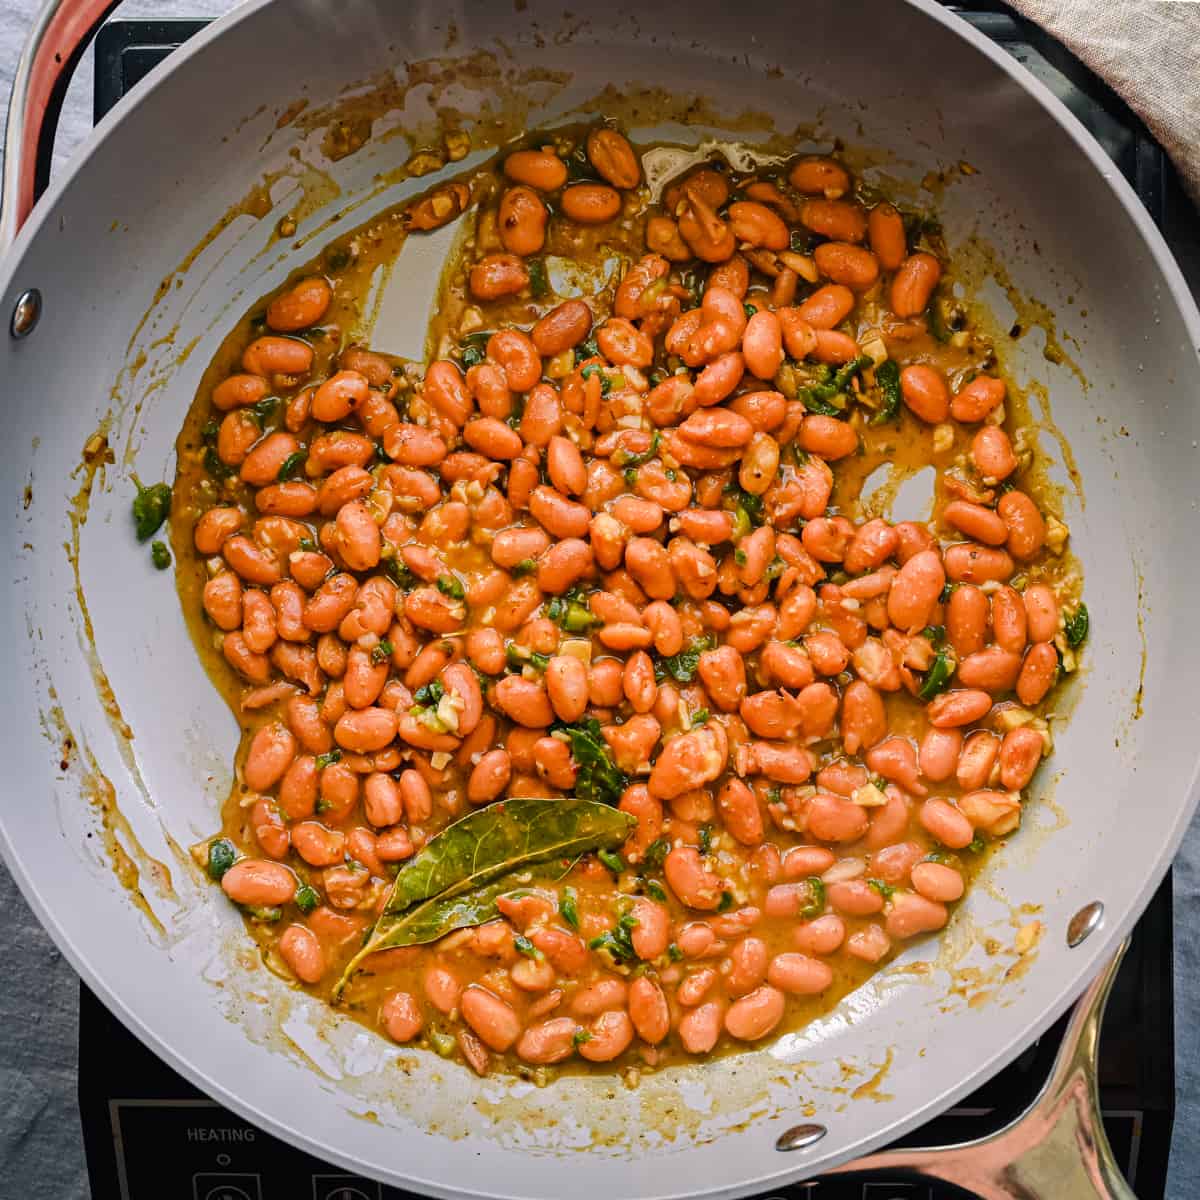
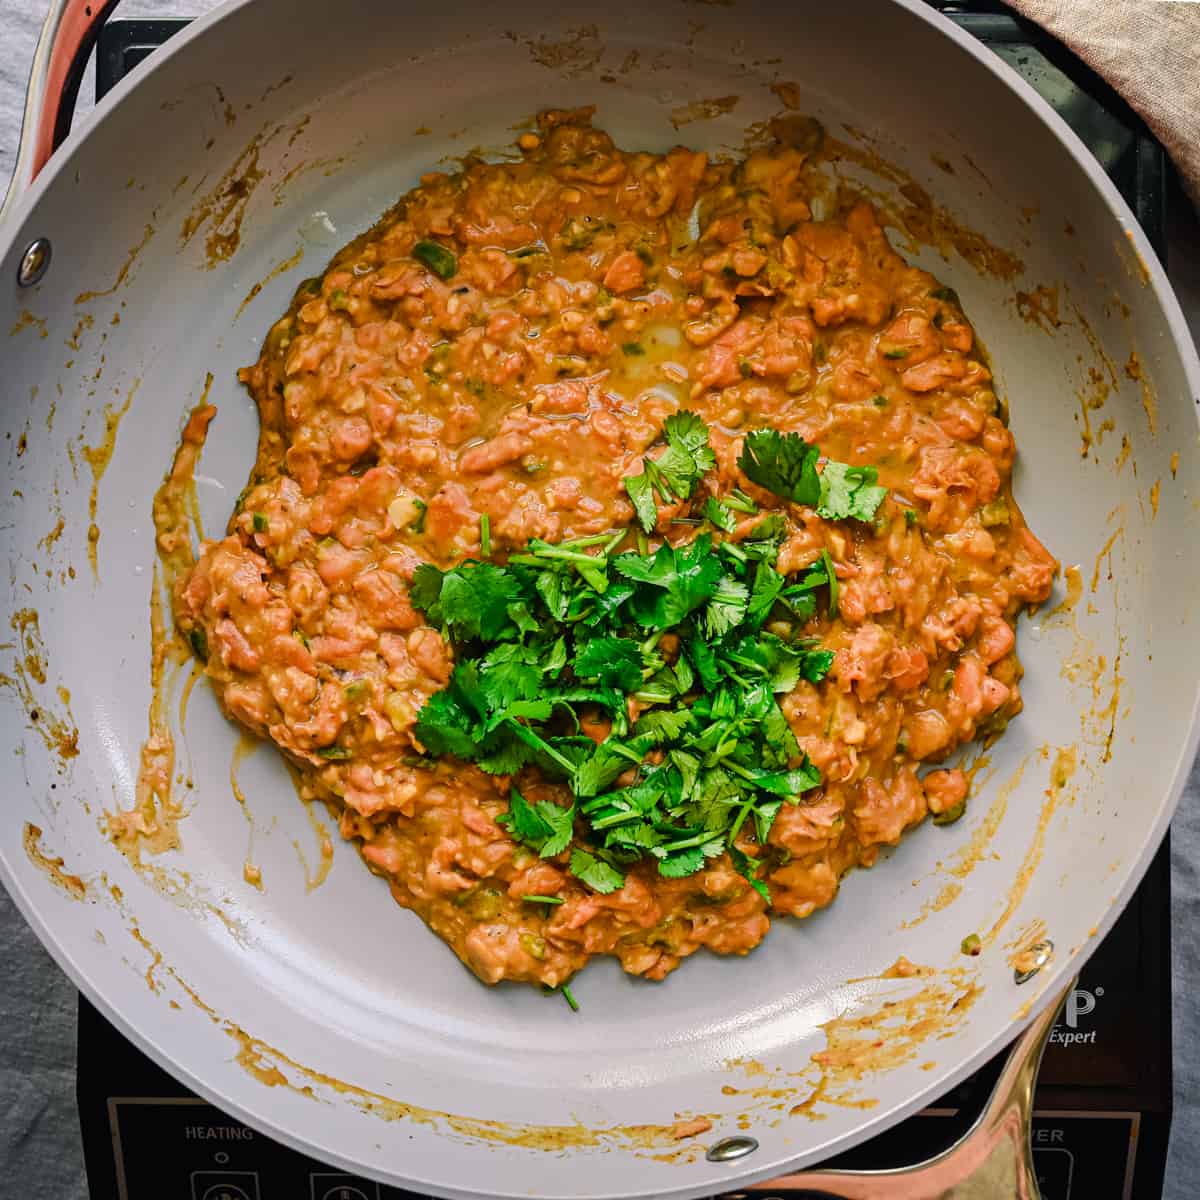
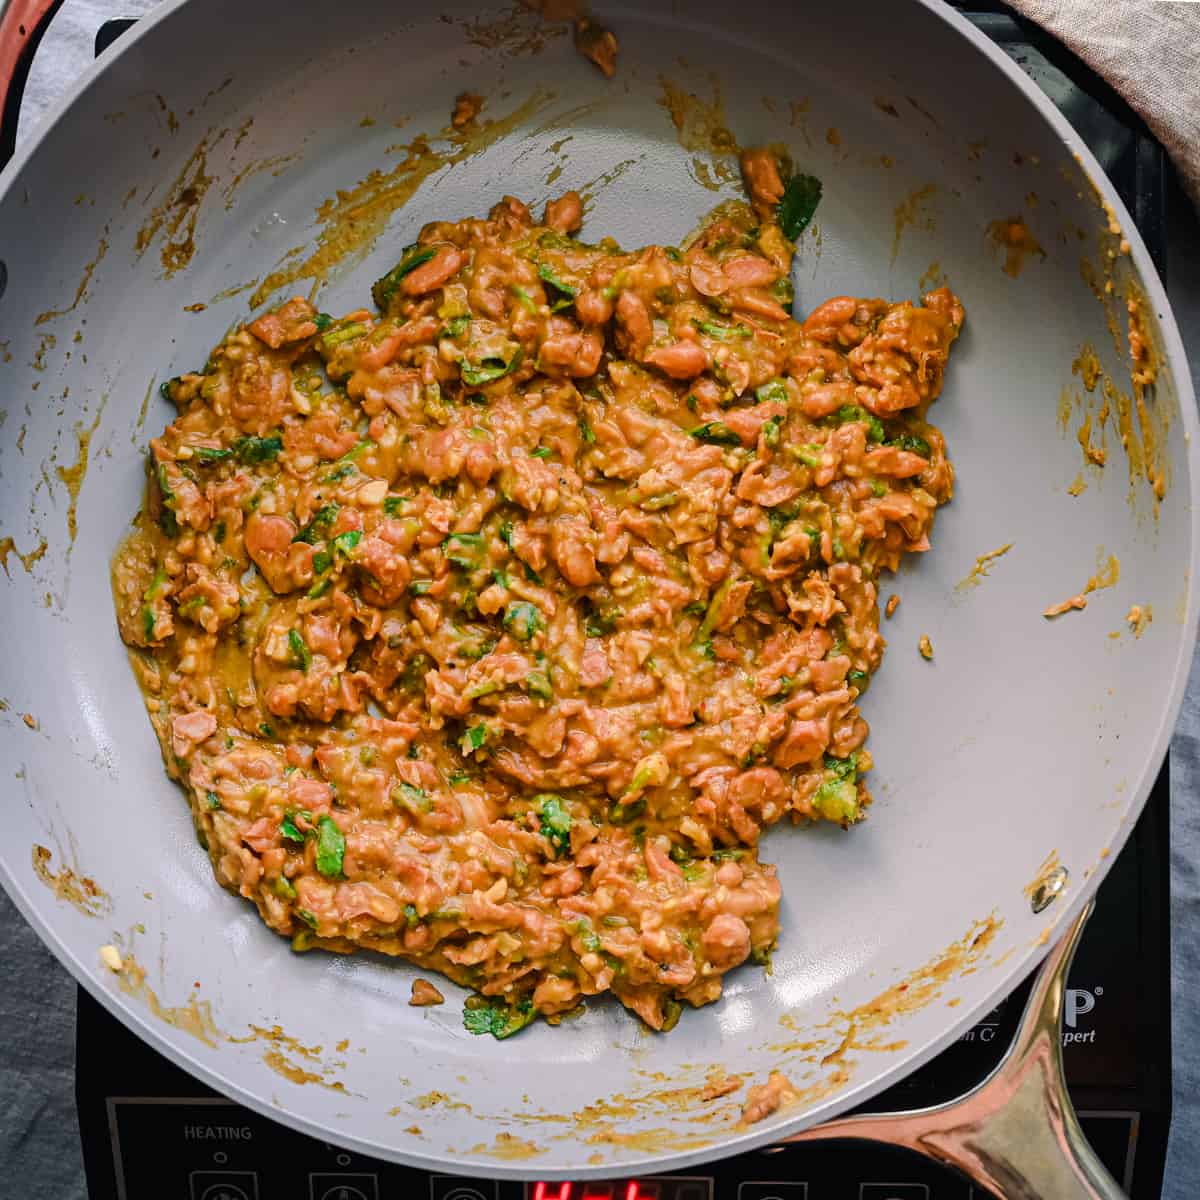
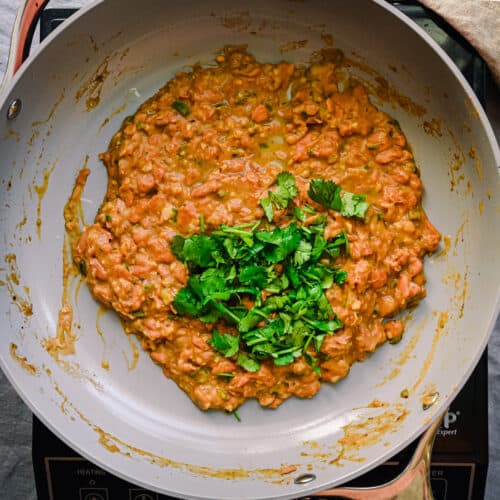
Remove bay leaves and mash most of the beans with a potato masher or immersion blender. Cook for 2-3 minutes, adding water or veggie broth as needed. Stir in cilantro, lime juice, and season with salt and pepper.
Queso
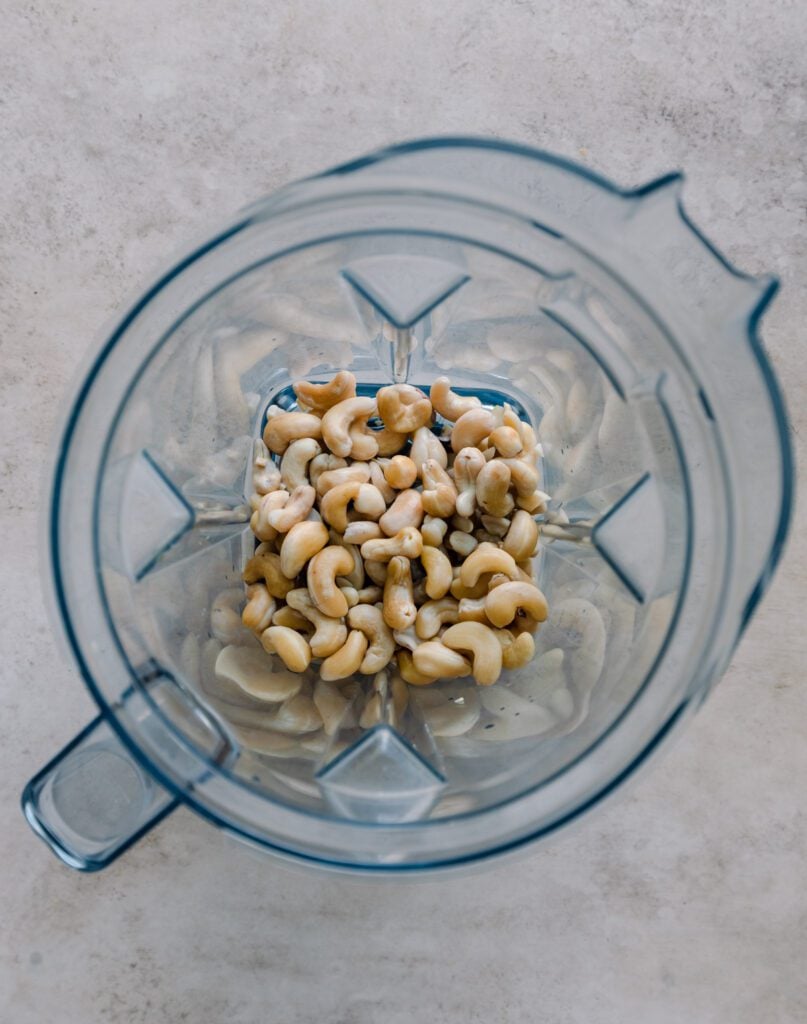
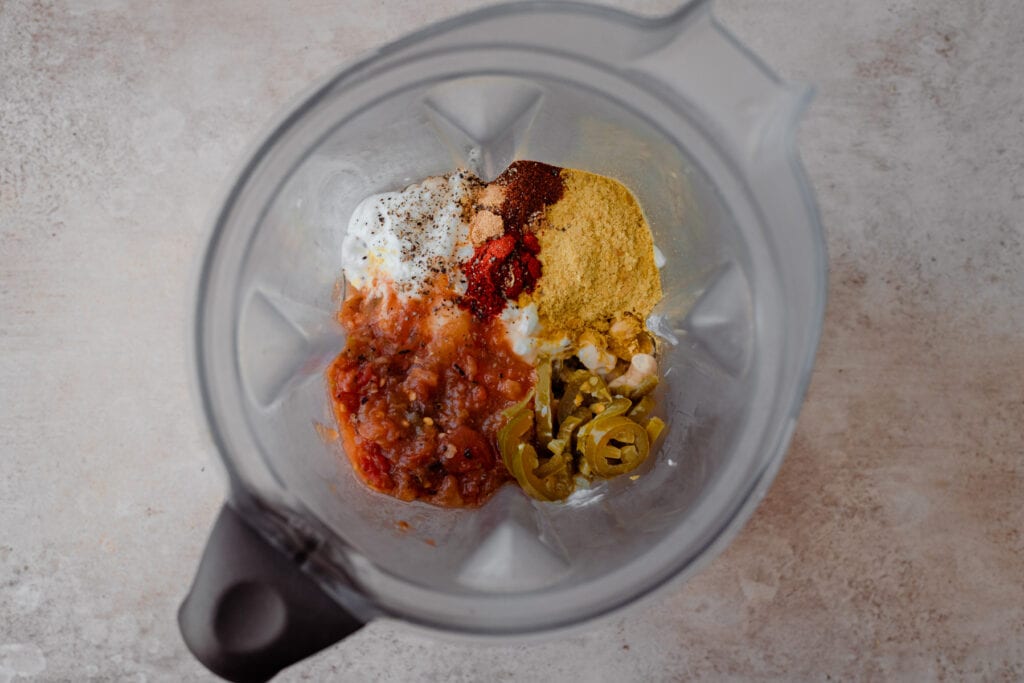
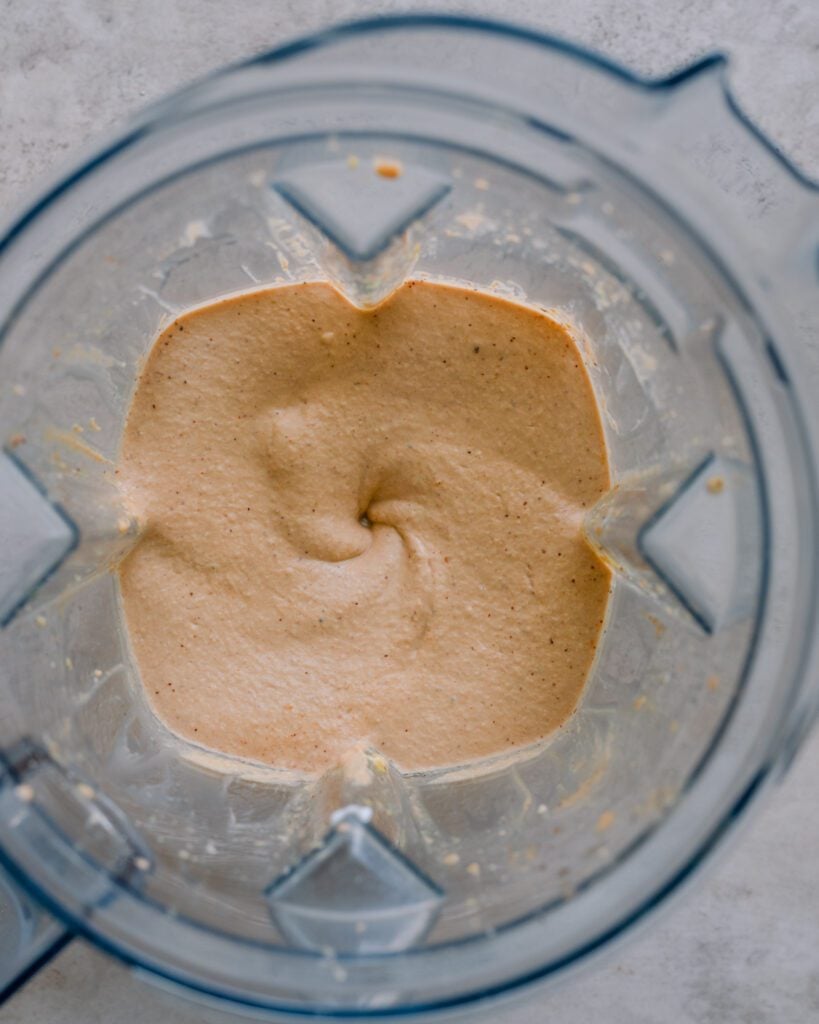
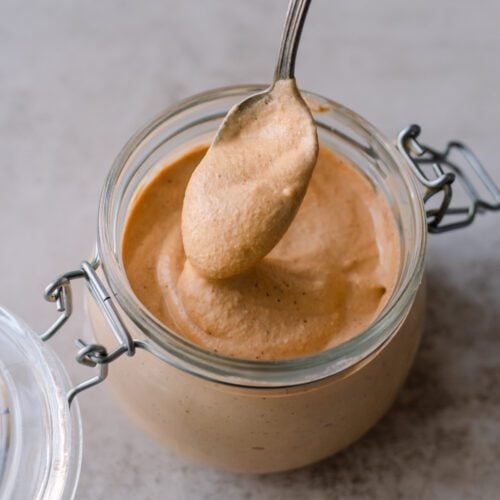
Add the soaked drained cashews to a high-speed blender. Add the salsa, vegan yogurt, spices, nutritional yeast, water, pickled jalapeños, andjalapeño brine.
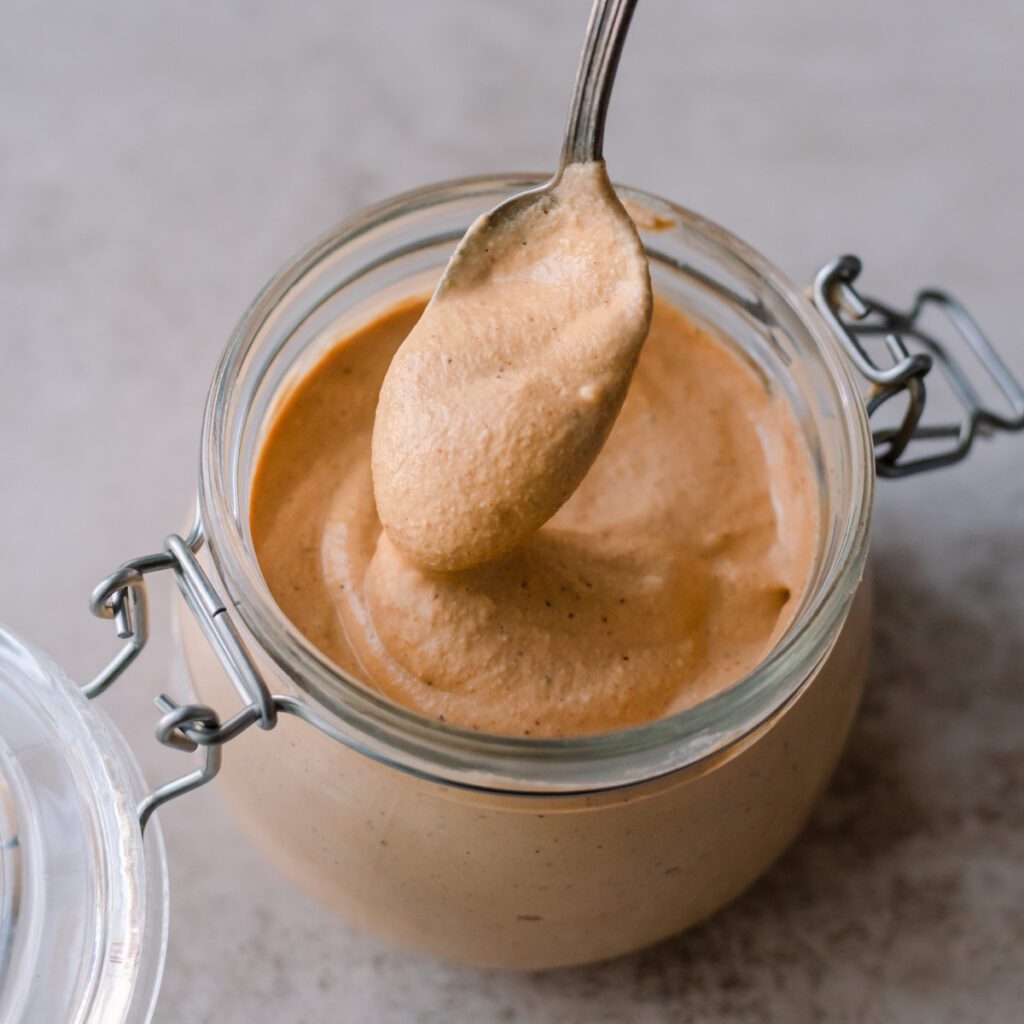
Blend until thick, smooth, and creamy. Add more water as needed to thin out, if desired.
Before assembling nachos, heat the queso up: add queso a small or medium saucepan and gently heat over low, stirring occasionally, for 6 to 8 minutes. Add a splash or two of water, if needed, to thin.
Assemble the Nachos
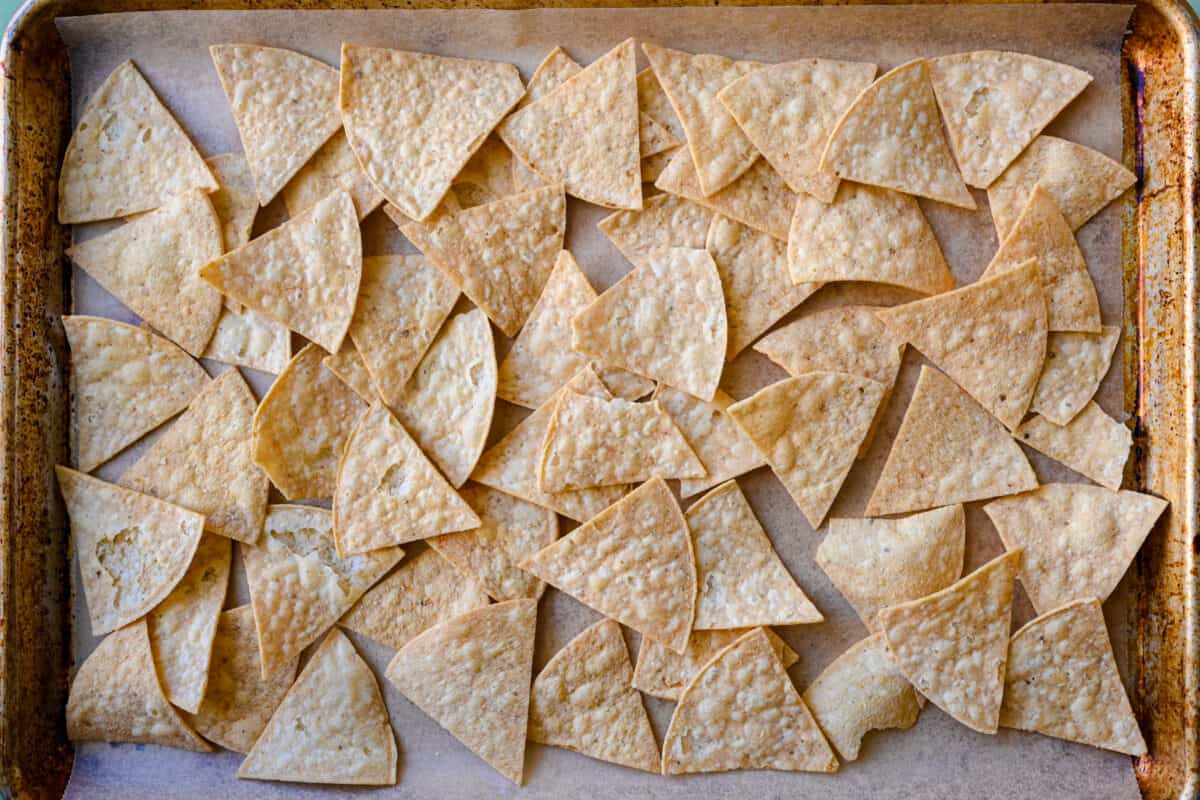
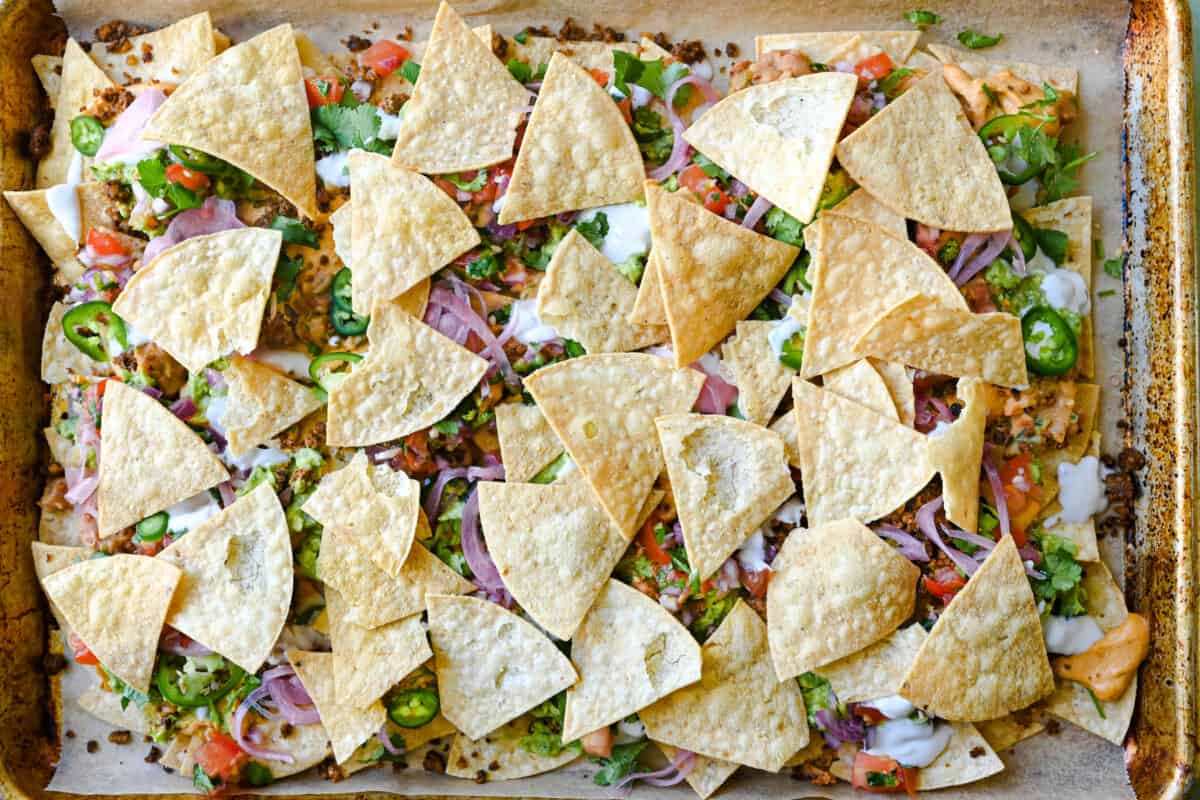
Add all of the tortilla chips to a rimmed sheet pan and heat up in the oven at 350ºF/175ºC for 5 minutes. Scoop half of the chips off the sheet pan and set aside.
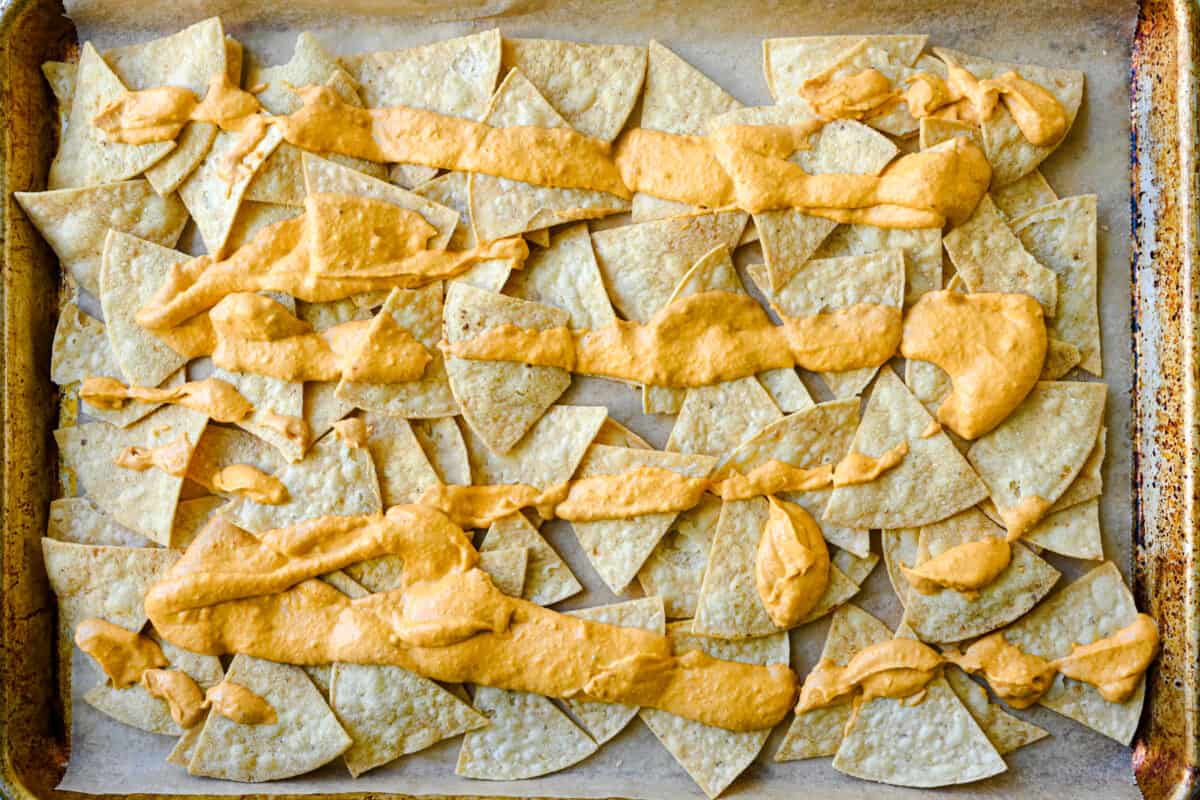
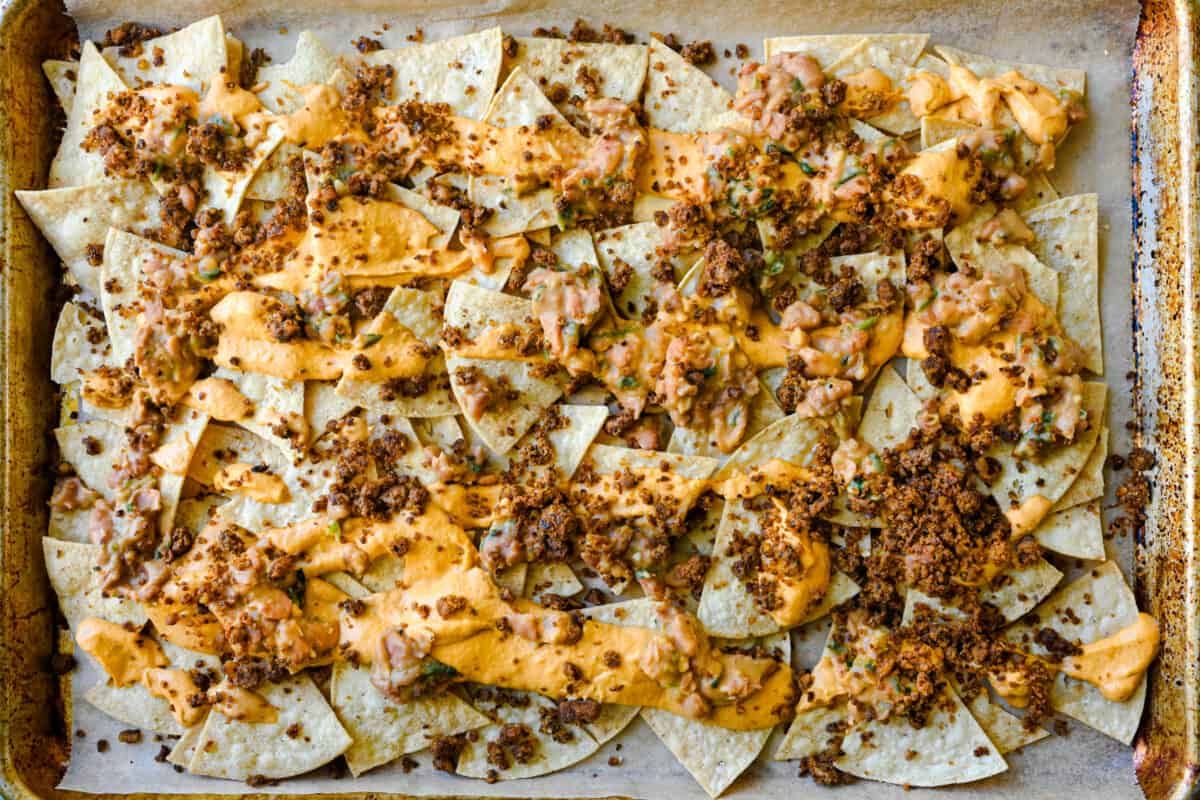
Spoon half of the queso on top of the half of the chips.
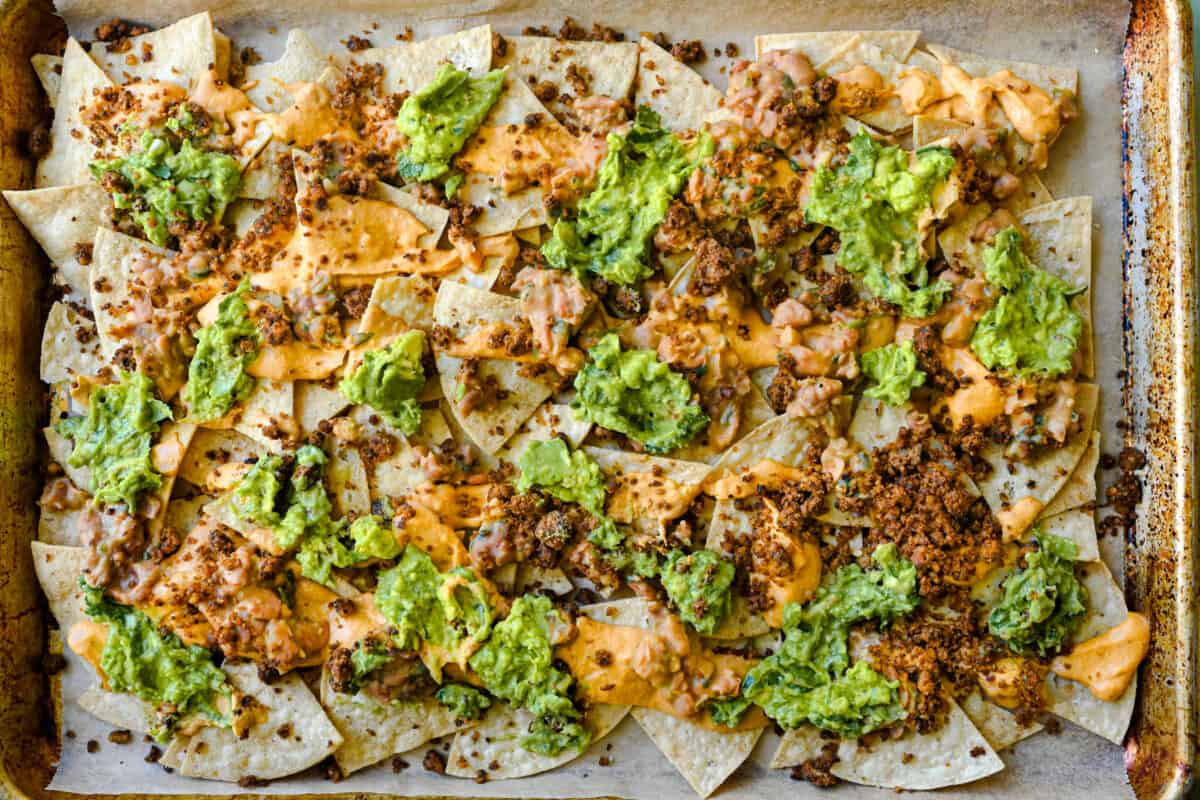
Top with half of the refried beans and half of the taco meat. Dollop a third of the guacamole on top.
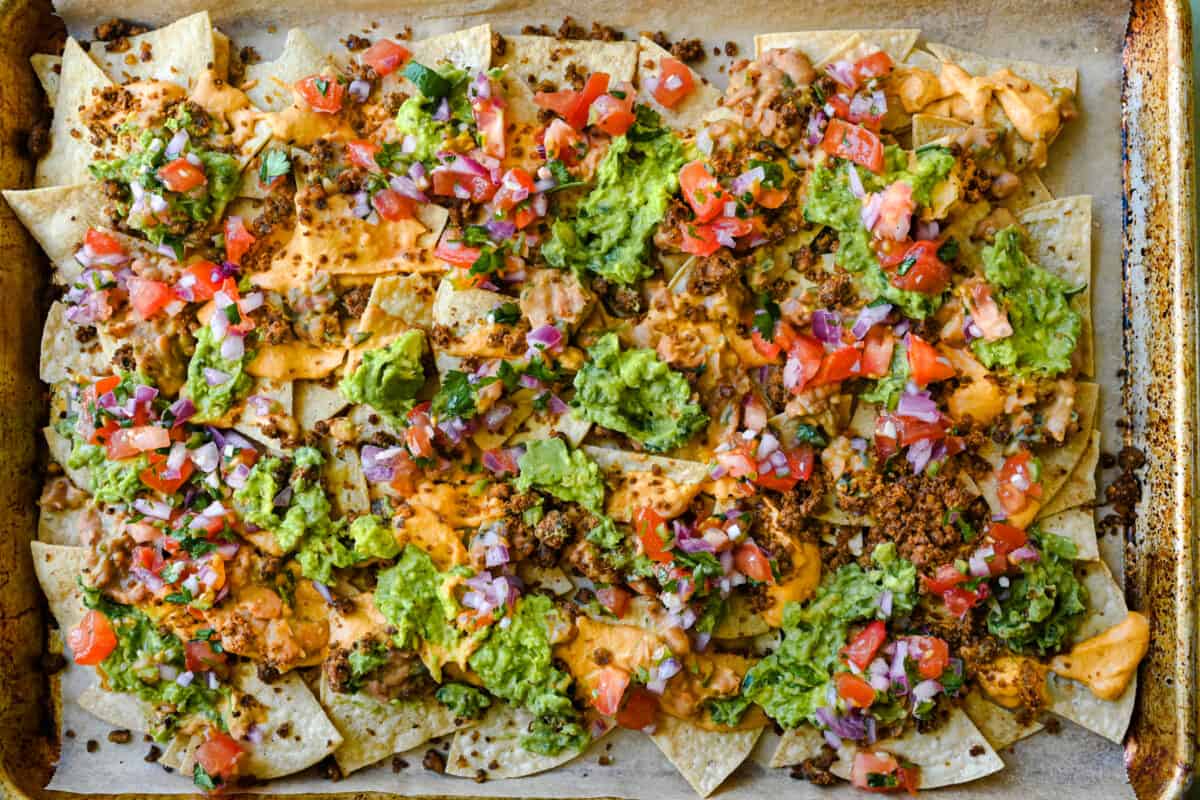
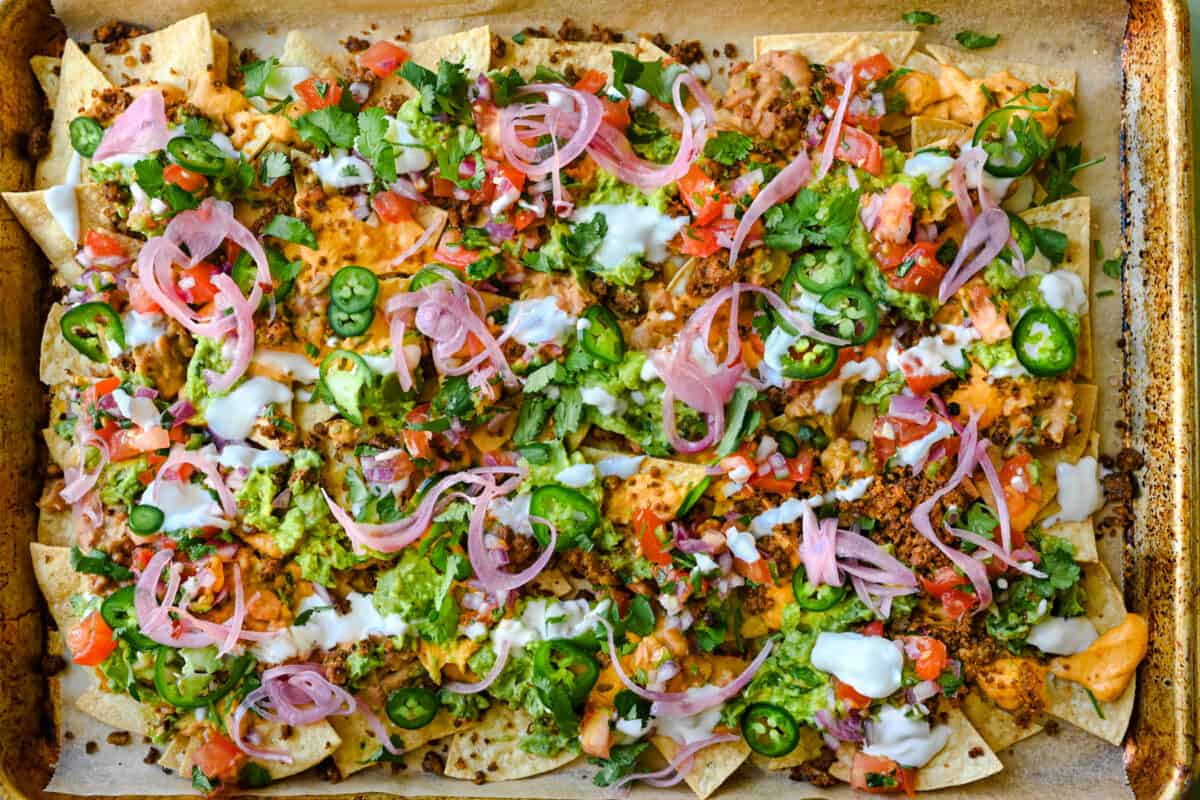
Spoon half of the pico de gallo (or salsa) on top. Drizzle several spoons of vegan sour cream across the nachos and add half of the rest of your fixings: sliced jalapeños, chopped cilantro, pickled onions, etc.
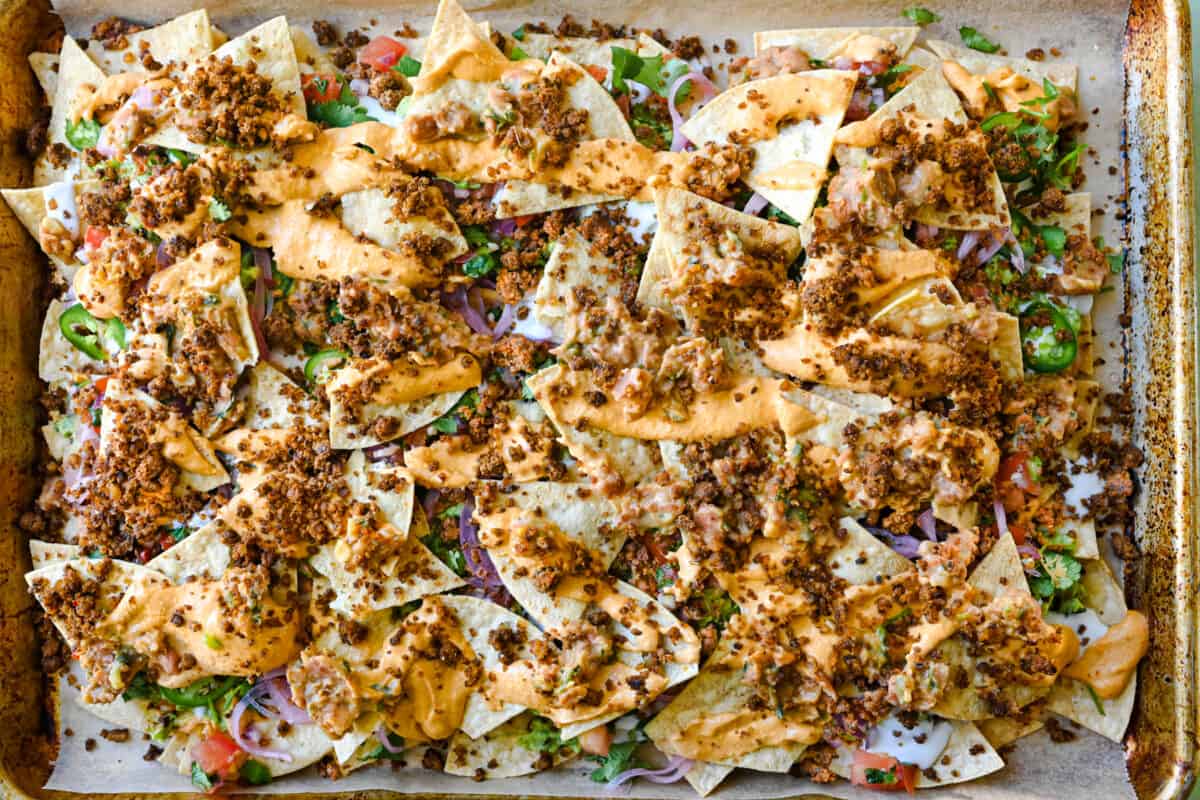
Top with the reserved half of tortilla chips. Top with the remaining queso, beans, and taco meat.
Add some more guacamole, pico de gallo, a few more spoons of vegan sour cream, and any remaining fixings. Serve immediately for maximal crisp, crunchiness; serve leftover guacamole on the side as a dip.
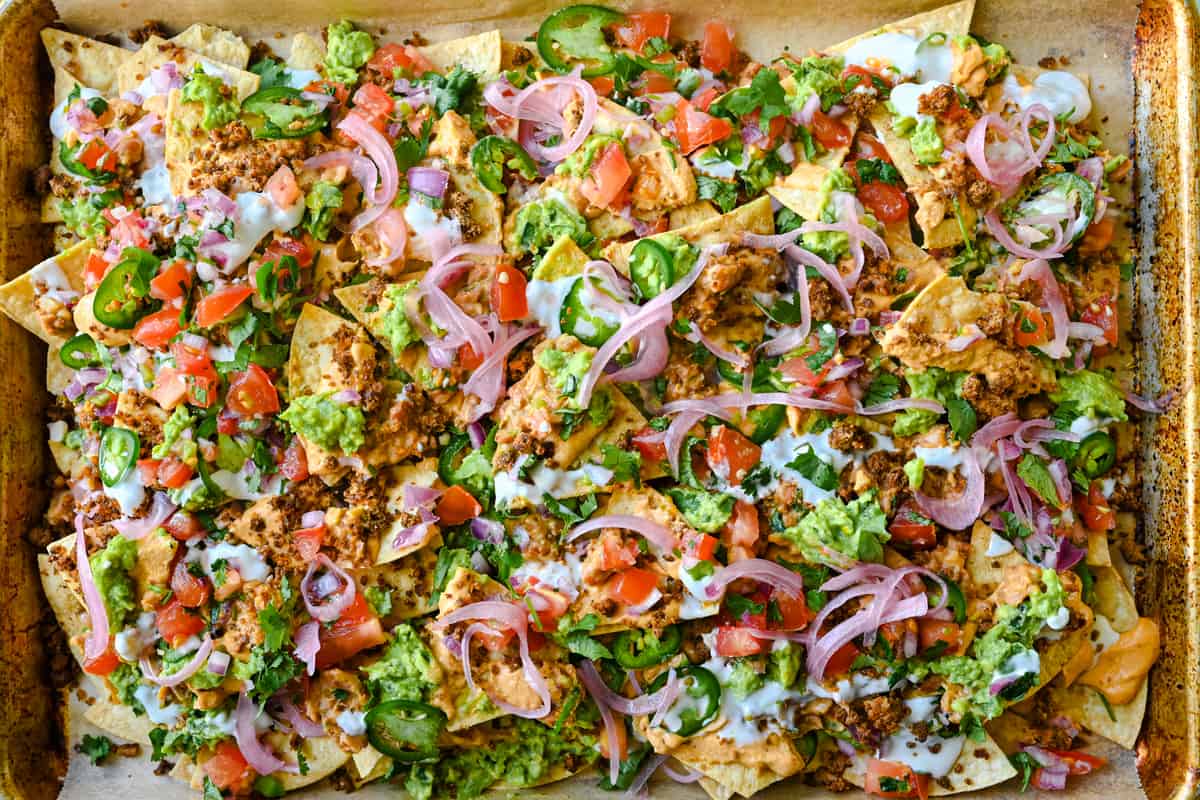
Tips for Making the Best Vegan Nachos
Not all tortilla chips are created equally. You cannot use any ol’ bag of tortilla chips for nachos, especially fully loaded nachos like these.
Trust me, the first time we made these nachos, we used a standard grocery store brand tortilla chip and the nachos were soggy in 5 minutes. It was so disappointing.
What tortilla chips are best for vegan nachos?
For loaded nachos, you need a thick, heavy, sturdy tortilla chip with structural integrity. Inspect the bag before buying them: Do they look thick? Do they look like they could be served at a Mexican restaurant? That’s what you’re looking for!
Some brands of thick tortilla chips include:
Casa Sanchez (Thick and Crispy) (available at Whole Foods), Calidad and Santitas (available at Vons, Ralph’s, Albertons, Walmart, etc.), Masa Uno Tortilleria Salted Chips (available at Mexican grocery stores), Mission Tortilla Rounds (widely available).
At some grocery stores, you can find bagged tortilla chips that were fried in-house or at a local restaurant. These work great!
Or you can make your own tortilla chips using corn tortillas (super sturdy). Here’s a guide on how to make your own tortilla chips.
Layer your fixings. This recipe calls for layering half of your fixings on top of half of the tortilla chips, then repeating this process. If you just add everything in one layer, the chips get weighed down under all the toppings, making them sad and soggy. And you miss out on optimal topping distribution.
If you aren’t serving the nachos immediately (like right now), leave off the first layer of cool toppings (guacamole, salsa, sour cream, jalapeños, cilantro, scallions, etc.). Add a layer of these cool toppings on top of all the nachos just before serving, and serve any leftover guacamole/salsa/sour cream on the side for dipping.
Heat up your warm ingredients. Before assembling the nachos, heat up or reheat the queso, refried beans, and taco meat.
For a super easy cleanup, line your sheet pan with parchment paper (or foil) before assembling.
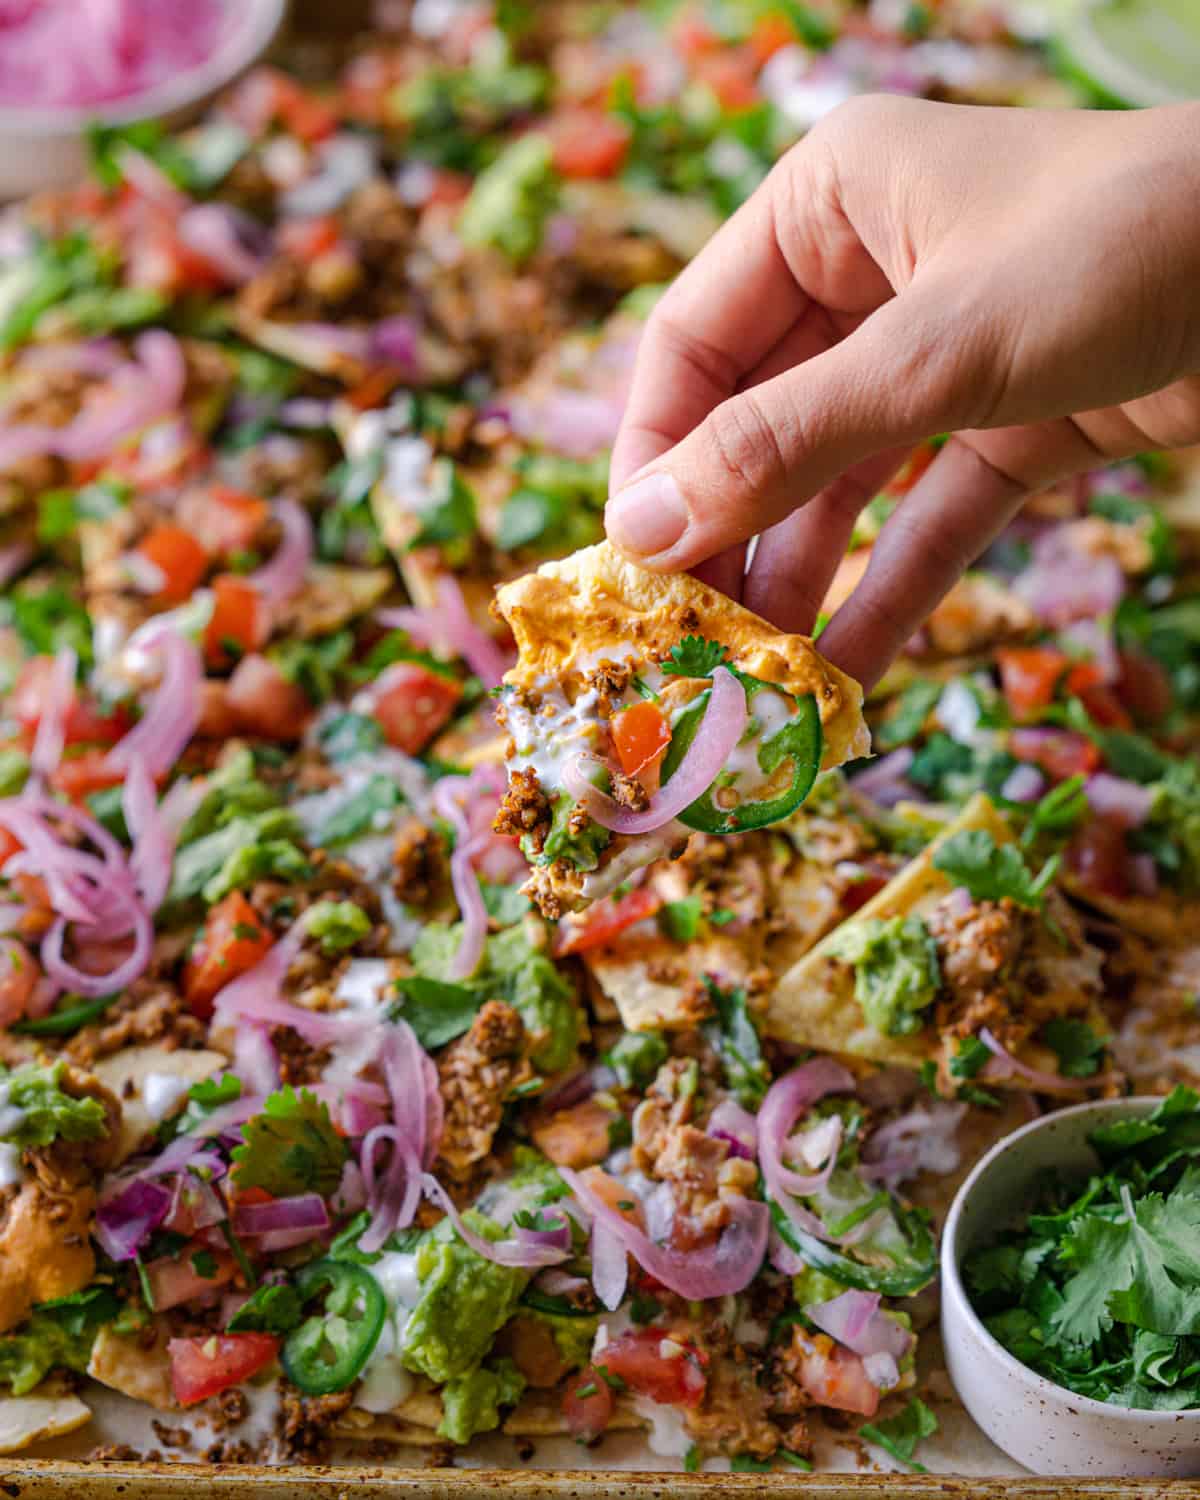
Frequently Asked Questions
Can I make any of the nacho components ahead of time?
Yes! The vegan queso and/or homemade sour cream can be made up to 5 days ahead of time; the taco meat and refried beans can be made 2-3 days ahead of time; the pico de gallo can be made 1 day ahead of time; the pickled onions can be made up to 10 days ahead of time.
The only item that you’ll want to make on the same day is the guacamole.
For the queso, taco meat, and refried beans, reheat them before assembling the nachos.
Can you keep leftover nachos?
I would not recommend it. Nachos are the best when freshly made and leftover nachos that have been sitting under the weight of toppings will be sad and soggy. Since this recipe is easy to scale down, just make the amount you and your guests will eat that day.
You can, however, keep some of the individual components as long as you have not combined them – see the previous question above about making components ahead of time.
Are these vegan nachos gluten-free? Are they soy-free?
Yep, they’re gluten-free! Just be sure to use tamari (GF soy sauce) when making the walnut-mushroom taco meat. The only soy in this recipe is the soy sauce in the taco meat; you can omit it and add salt to taste, or use a store-bought soy-free vegan meat.
More Tex-Mex and Mexican-Inspired Recipes
If you love these Vegan Nachos, please give it a rating and review below! And of course, tag me with your remakes on Instagram!
Seriously the Best Vegan Nachos
When you need a guaranteed crowd-pleasing appetizer, make these fully loaded vegan nachos! Tortilla chips get layered with vegan queso, taco meat, refried beans, guacamole, pico de gallo, vegan sour cream, and pickled onions for the ultimate nacho experience.
- 12 to 16 ounces of sturdy tortilla chips*
- 1 batch Vegan Queso (recipe card below)
- 1 batch Saucy Refried Beans (recipe card below)
- 1 batch Walnut-Mushroom Taco Meat (recipe card below)
Other Topping Options
- 1 batch Guacamole (recipe card below) or diced avocado**
- 1 batch Pico de Gallo (recipe card below) or your favorite salsa***
- A few tablespoons of Vegan Sour Cream (store-bought or use the homemade recipe below)
- 1 handful of Pickled Onions recipe card below
- ½ cup (8g) cilantro leaves and tender stems, chopped
- 1 to 2 fresh jalapeños, thinly sliced
- 3 scallions, thinly sliced
Preheat the oven to 350ºF. Line a rimmed sheet pan with parchment paper.
Warm up your queso (on the stove in a saucepan). Warm up your refried beans (microwave or saucepan). Warm up your taco meat (frying pan on the stove). See the respective recipe cards for instructions.
Warm up the chips. Transfer all of the chips to the lined sheet pan. Heat in the preheated oven for 5 minutes to warm up.
Assemble the nachos. Take the sheet pan out of the oven and scoop about half of the chips onto a large plate or cutting board and set aside.
Evenly spoon half of the warm queso on top of the chips. Add half of the warm refried beans, then half of the taco meat.
Add your other toppings: a third of the guacamole or half of the avocado, half of the pico de gallo or salsa, a couple spoons of vegan sour cream, and half of the other toppings: pickled onions, cilantro, jalapeños, and/or scallions.***
Add the reserved tortilla chips on top. Layer with the remaining queso, refried beans, and taco meat. Finish with the rest of the optional toppings: one third of the guacamole, remaining pico de gallo or salsa, a few more spoons of sour cream, and remaining other toppings.
Serve immediately for maximal crispy crunchiness. Serve leftover guacamole on the side as a dip.
*A thick, heavy, sturdy tortilla chip with structural integrity is ESSENTIAL; otherwise your nachos will be soggy.
Some brands of thick tortilla chips include: Casa Sanchez (Thick and Crispy) (available at Whole Foods), Calidad and Santitas (available at Vons, Ralph’s, Albertons, Walmart, etc.), Masa Uno Tortilleria Salted Chips (available at Mexican grocery stores), Mission Tortilla Rounds (widely available).
You can also find bagged tortilla chips that were fried in-house or at a local restaurant. These work great!
**The guacamole recipe below makes enough so you’ll have extra as a dip. If you want to scale the recipe down, feel free to do so.
**If not using pico de gallo or fresh salsa, I recommend adding something fresh and crunchy, like the pickled red onions.
***If you aren’t serving the nachos immediately like right now, leave off the first layer of cool toppings (guacamole, salsa, sour cream, jalapeños, cilantro, scallions, etc.). Add a layer of these cool toppings on top of all the nachos just before serving, and serve any leftover guacamole/salsa/sour cream on the side for dipping.
NOTE: The prep and cook time are for reheating your queso/beans/taco meat and assembling the nachos. The exact cook time will depend on which fixings you make.
An addictively good yet extremely easy vegan cheese sauce that tastes just like queso. Less than 10 ingredients and everything happens in a blender. Use it in burritos, quesadillas, tacos, or nachos, or warm it up and serve as a hot queso dip with tortilla chips!
- 1 cup (~130g) raw cashews
- 1/2 cup (~112g) vegan coconut yogurt (unsweetened, plain)
- 1/2 cup (~120g) of your favorite salsa
- 2 tablespoons water
- 1 teaspoon ground cumin
- 1/2 teaspoon chili powder
- 1/2 teaspoon smoked paprika
- Several cracks of freshly cracked black pepper
- 2 tablespoons nutritional yeast
- 2 tablespoons pickled jalapeños + 2 tablespoons of the pickled jalapeño brine
- Kosher salt or sea salt to taste
Add the raw cashews to a saucepan. Cover with water and bring to a boil. Boil for 15 minutes. Drain the soaked cashews.
Alternatively, you can soak the cashews in cool water overnight.
If you have a high-powered blender like a Vitamix, you can soak the cashews in boiling water for 15-30 minutes.
Add the drained cashews to a high-powered blender. Add the yogurt, salsa, water, cumin, chili powder, paprika, black pepper, nutritional yeast, pickled jalapeños, and pickled jalapeño brine. Blend until thick, creamy, and smooth. Taste for seasonings, adding salt as needed.
Note: the pickled jalapeños are decently salty, so I don’t add much salt, but if you skip them, be sure to add salt (1/2 to 1 teaspoon kosher salt).
To serve warm, add the queso to a small saucepan and gently heat over low heat, stirring occasionally, for 8 minutes. If it seems too thick, add a splash of plant-based milk or water and stir to incorporate.
Walnut-Mushroom Taco Meat
Made from walnuts, mushrooms, and spices, this vegan taco meat is surprisingly meaty and delicious but 100% wholesome. Quick and easy to make and versatile (use in nachos, tacos, quesadillas, or burrito bowls).
- 3/4 (85g) cup raw walnuts
- 1 cup (75g) roughly chopped mushrooms (we used cremini)
- Kosher salt
- Freshly cracked black pepper
- 1 teaspoon soy sauce or tamari*
- 1 teaspoon lime juice more for finishing
- 2 teaspoons avocado oil
- ½ cup 8g chopped cilantro leaves and tender stems (optional)
Homemade Taco Seasoning
- 1 teaspoon Mexican oregano or regular oregano
- 1 teaspoon ground cumin
- 1 teaspoon chili powder
- ½ teaspoon ground coriander
- ½ teaspoon garlic powder
- ½ teaspoon smoked paprika
- ¼ teaspoon onion powder
- ¼ teaspoon cayenne pepper (use ⅛ for less heat)
Toast the walnuts. Add walnuts to a dry skillet over medium-low heat and toast for 4 to 5 minutes, stirring frequently, until they smell toasty and are darker in spots. Or, spread them out on a sheet pan and toast them in a preheated oven at 350ºF/175ºC for 7 minutes.
Add the toasted walnuts to a food processor. Perform a few long pulses until the walnuts are very finely chopped, but don’t over-process, or it’ll start turning into walnut butter.
To the food processor, add the chopped mushrooms, heaping ¼ teaspoon kosher salt, several cracks of black pepper, Homemade Taco Seasoning, lime juice, and soy sauce.
Blend for a few seconds, followed by several pulses until everything is very finely chopped but not smooth like a dip or patê. Taste, adding more lime juice or soy sauce, as needed.
Cook the taco meat. Heat a large nonstick frying pan over medium to medium-high heat with the avocado oil. Once hot, add the walnut-mushroom meat. Cook for 2 minutes, then use a wooden spoon or angled spatula to break up the meat into as small pieces as you can. Cook for another 3 to 5 minutes, or until browned and slightly crispy.
To reheat, add taco meat to a frying pan over medium heat. Cook until warmed through and slightly crisp.
*Use tamari to keep gluten-free. If you’re allergic to soy, omit the soy sauce; add an extra squeeze of lime juice and more salt to taste.
An easy and quick but delicious recipe for vegan refried beans. Using the canned bean liquid keeps them saucy, while fresh garlic, jalapenos, spices, cilantro and lime add lots of flavor.
- 1 tablespoon olive oil or neutral-flavored oil of choice
- 3 garlic cloves, minced
- 1 jalapeno pepper, finely chopped
- 1 teaspoon dried oregano
- ½ teaspoon chili powder
- ½ teaspoon ground cumin
- 1 (15-ounce / 440g) can pinto beans or black beans (keep the bean liquid, don’t drain)
- 1 bay leaf
- ¼ to ⅓ cup (60 – 80 mL) vegetable broth or water, only as needed
- Kosher salt or sea salt to taste
- Freshly cracked black pepper to taste
- 1 tablespoon fresh lime juice
- 1 small handful of cilantro, chopped
Heat the oil in a large frying pan over medium heat. Once the oil is hot, add the garlic and jalapenos. Cook for 90 seconds to 2 minutes, stirring frequently, until the garlic starts to turn golden. Add the oregano, chili powder, and cumin and cook for 1 minute, stirring frequently.
Add in the beans with their liquid, bay leaf, and a pinch of salt and pepper. Cook for 5 to 7 minutes, or until the beans are saucy, the liquid has evaporated quite a bit and the mixture has thickened, stirring occasionally. Remove the bay leaf and take off the heat.
Using an immersion blender or a potato masher, mash most of the beans, but leave some beans whole for texture if you want. Return the pan to the stove and cook the beans, stirring often, for 2 to 3 minutes. If the beans appear dry, add a few spoons of veggie broth or water and stir to combine.
Season the beans with salt and pepper to taste. Turn off the heat, and stir in the lime juice and cilantro.
When reheating on the stove or in the microwave, add a few splashes of water or vegetable broth to loosen the beans.
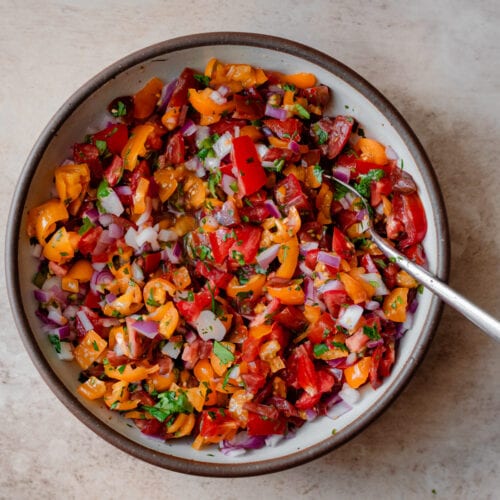
An easy yet extremely flavorful salsa fresca, aka pico de gallo. I use cherry or grape tomatoes when it’s not tomato season, but feel free to use any tomatoes you like.
- 1 serrano pepper, finely minced (use jalapeño for a milder version or de-seed the pepper)
- 3/4 cup diced red onion (100g)
- 2 ½ tablespoons fresh lime juice, plus more to taste
- 3/4 teaspoon kosher salt, plus more to taste
- 12 ounces good-quality tomatoes, diced*
- 1 fat garlic clove, grated or crushed (optional)**
- 1/2 cup fresh cilantro, chopped
- Freshly cracked black pepper to taste
Combine the serrano pepper, onion, salt, and lime in a large bowl and allow to marinate for 10 minutes.
Place the tomatoes in a colander or strainer and sprinkle with a pinch or two of salt. Let rest for 10 minutes, while the onion mixture is marinating. This is done to drain excess water from tomatoes and avoid a watery salsa.
Add the tomatoes to the onion mixture, along with the garlic and cilantro. Mix to combine, then season to taste with salt and pepper. Toss again, and adjust seasonings accordingly, adding more salt or lime juice as needed. Allow to rest for 5-10 minutes to allow the flavors to meld.
* I used cherry tomatoes here, but good-quality whole tomatoes work well too. You can chop the tomatoes by hand or pulse a few times in a food processor.
** I don’t think the salsa needs the garlic when combined with a bunch of other flavors and used in burritos or nachos, but if making this salsa on its own for serving with another recipe, I like to add the garlic.
An easy but tasty guacamole recipe! This recipe makes quite a lot of guacamole, so feel free to halve the recipe depending on how many nachos you’re making.
- 3 ripe avocados
- 1 large juicy lime juiced
- 1 jalapeño diced (or add a pinch or two of cayenne pepper)
- 2 garlic cloves crushed
- 1/4 cup fresh cilantro chopped
- Kosher salt or sea salt to taste
Scoop out the avocado flesh into a bowl. Squeeze the lime juice on top. Add the jalapeños, garlic, and cilantro, and mash everything up with a fork until smooth but there are still some rough avocado chunks. Season to taste with salt.
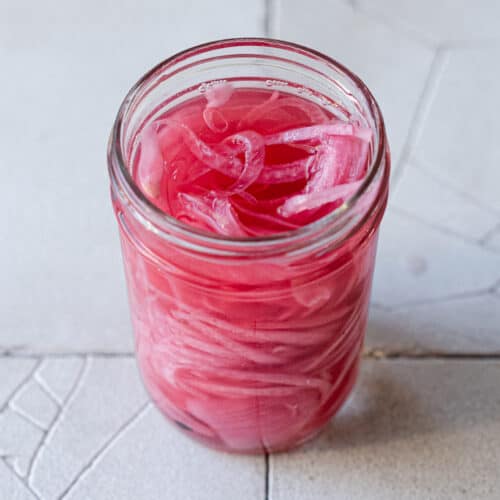
An easy, fuss-free recipe for quick pickled red onions. The perfect topping for nachos, as well as chili, grain bowls, and salads.
- 1 medium-large red onion sliced as thinly as possible*
- 1/4 to 1/2 teaspoon red pepper flakes (optional)
- 1/4 cup + 1 tablespoon distilled white vinegar
- 1/2 cup + 2 tablespoons 150 mL water
- 1 tablespoon organic cane sugar or maple syrup
- 2 teaspoons kosher salt
Use warm soapy water to wash a 1-pint jar, lid and sealing ring. Rinse well. Add the onions and chili flakes (if using to the jar), packing the onion jar as tightly as you can without smushing it. Make sure there is ½ to 1-inch of space from the rim of the jar to the tops of the onions.
Bring the vinegar, water, salt, and sugar to a boil in a small saucepan, whisking to dissolve the sugar and salt. Over the sink, pour the hot brine over the onions and submerge, pressing down on them with the end of a wooden spoon if needed.
Gently tap the jar against the counter a few times to remove all the air bubbles. Top off with more brine if necessary, and seal the jar(s).
Let the jar cool to room temperature before refrigerating. Taste the pickled vegetables after 8 hours, but try to wait for 48 hours to allow the flavors to more fully develop.
Store in the fridge for 2 to 3 weeks.
*If you have a mandoline, that works best.
Homemade Vegan Sour Cream
A simple but delicious vegan sour cream made using just 5 ingredients! Made with more wholesome ingredients than store-bought options and couldn’t be easier!
- 1 cup (130g) raw cashews, soaked overnight or for 8 hours*
- 21/2 tablespoons freshly squeezed lemon juice
- 1/2 teaspoon white vinegar
- 1/2 cup ~112g coconut yogurt (I used this one)
- Heaping 1/4 tsp sea salt plus more to taste
- 1/2 teaspoon garlic powder
- 3-4 tablespoons water more as needed
Add all of the ingredients except for the water to a high-powered blender and blend until smooth and creamy, scraping down the sides frequently. Then add a tablespoon of water, at a time, until you the sour cream comes together and the cashews are fully pulverized.
Taste for seasonings, adding more salt, lemon juice, or vinegar as needed.
Refrigerate before using.
*I recommend soaking the cashews overnight, if you can, instead of in boiling water for 1 hour, because it really softens them up. There isn’t much liquid in this recipe, so even when you’re using a fancy blender like a Vitamix, having really soft cashews will make it easier to blend.
I also recommend refrigerating this sour cream before using, as it significantly improves its taste.


